
Related Topics
WatchGuard FireClient for iOS
Together, WatchGuard FireClient and your WatchGuard Mobile Security subscription to make sure that only mobile devices that meet minimum approved standards can get access to your network through Wi-Fi or a VPN connection. Before your mobile device is allowed to join the network, FireClient verifies that your device runs the minimum required OS version and confirms that your device has not been jailbroken.
These instructions are also available in the WatchGuard Knowledge Base article Use WatchGuard FireClient for iOS.
Before You Begin
FireClient is supported on iOS 8.0 and higher. Before you connect to a network that requires FireClient, you must install the FireClient app from the Apple App Store.
To use FireClient on a network, you must have this information:
- The name or IP address of the server that FireClient connects to
- A user name and password to authenticate to the network
Your network administrator can enable one or more of these authentication servers to be used for authentication: a RADIUS server, an Active Directory server, or the Firebox. If your network supports more than one type of authentication, it might be necessary for you to include the authentication server or domain name with your user name in FireClient. If this is required, you must specify your user name in this format:
<authentication server>\<username>
For example, if your user name is j_smith:
- Firebox — Firebox-DB\j_smith
- Active Directory server (ad1_example.com) — ad1_example.com\j_smith
- RADIUS server — radius\j_smith
Your administrator should provide the authentication credentials you must use for FireClient connections to your network.
Use FireClient
You must use FireClient to check your mobile device for compliance each time you connect to a network that requires it.
- Use Wi-Fi or a VPN client to connect your iOS device to the network.
- Launch the FireClient app.
The Connect page appears.
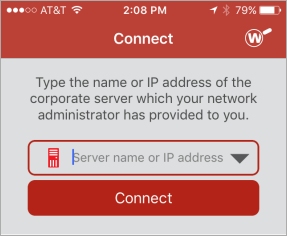
- Type the server name or IP address and tap Connect.
The Login page appears. Login is not required if you use a VPN to connect.
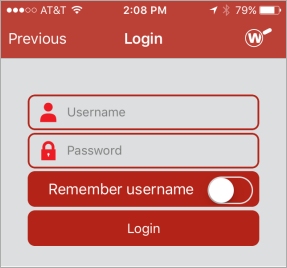
- Type your user name and password for this network.
- To enable FireClient to remember your user name the next time you log in, move the Remember username slider.
- Tap Login.
- If the Device Authorization Agreement appears, review it, and tap Accept.
FireClient runs a compliance check on your device and shows the connection and compliance status.
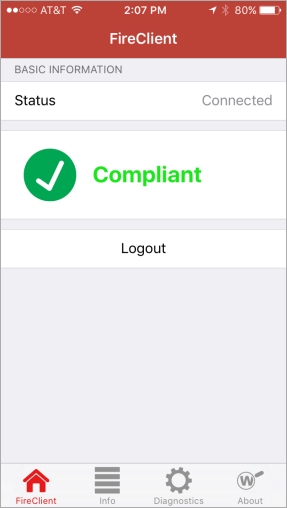
After you log in, FireClient shows the compliance status:
- Compliant — Your iOS device complies with the security requirements and is allowed to use this network. For your device to remain compliant, do not close FireClient while you are connected to the network.
- Unknown — The compliance status is unknown. If you see this status, verify that your iOS device is connected to Wi-Fi or has a VPN connection to the network that requires FireClient.
- Not Compliant — Your iOS device does not comply with security requirements and cannot use this network.
If your device is not compliant, the reason appears in FireClient. Possible reasons include:
- OS version not allowed — This network does not allow the OS version installed on your iOS device. Tap the reason message to see the currently installed OS version and the allowed OS versions. You must upgrade your device to an allowed version to use this network.
- Your device is jailbroken — Jailbroken devices are not allowed on this network.
If the compliance status is not Compliant, your iOS device cannot connect to network resources or the Internet.
If your iOS device is not compliant, resolve the reported issue. You can then return to FireClient to run the compliance check again.
To end your FireClient session, or to reconnect as a different user, tap Logout.
FireClient App Navigation
To select a page in FireClient, tap an icon at the top of FireClient.
![]()
The navigation icons, from left to right, are:
- FireClient — The home page that shows the connection and compliance status
- Info — Shows details about your connection and iOS device
- Diagnostics — Shows FireClient log messages
- About — Shows information about the FireClient app
Information
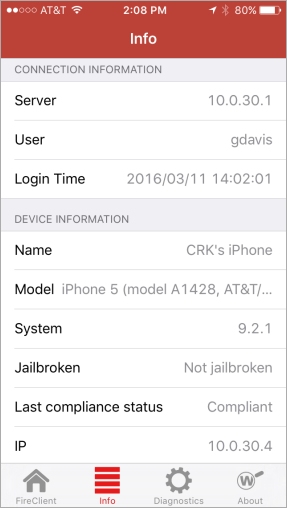
The Info page shows details about your connection and iOS device. The Connection Information section includes the server IP address, your user name, and when you logged in. The Device Information section includes information about your iOS device, the last compliance status for the device, and the IP address assigned to your device.
Diagnostics
FireClient saves log messages to a file on your iOS device. You can see the log file on the Diagnostics page. If FireClient has an error, your administrator might ask you to send a copy of the log file.
To see the FireClient log file:
- Tap the Diagnostics icon.
The Diagnostics page appears.
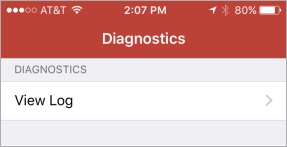
- Tap View Log.
The View Log page appears.
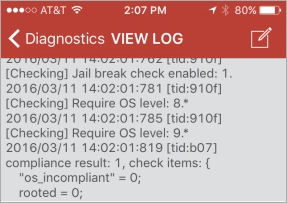
- To send the log file as an email attachment, tap the icon at the top-right corner.
An email message with the attached file appears. - Specify one or more recipients.
- Tap Send.
The log file is sent as an attached zip file.
If you have not configured the email client on your iOS device, you can use the file sharing feature in iTunes to copy the FireClient log file to your computer.
FireClient Device Protection
After FireClient has confirmed your iOS device is compliant, FireClient periodically contacts the server to confirm your device is still compliant.