
Related Topics
Configure a Modem Interface
To use a modem with your Firebox, connect the modem to your Firebox and power the modem on.
Some of the features described in this section are only available to participants in the WatchGuard Beta program. If a feature described in this section is not available in your version of Fireware, it is a beta-only feature.
In Fireware v12.1.1 and higher, you can hot plug modems into the Firebox. The modem operates and does not require a Firebox reboot when:
- You plug in a new modem
- You unplug a modem and plug it in again
- The modem unexpectedly disconnects and reconnects to the Firebox
In Fireware v12.1 and lower, if you connect a modem while the Firebox is powered on, you must reboot the Firebox. The Firebox recognizes a modem only if the modem is connected and powered on when the Firebox reboots.
Account Settings
To configure the account settings for your modem, from Fireware Web UI or Policy Manager:
- Select Network > Modem.
- Make sure that the Enable Modem check box is selected.
- In the Dial Up Account Settings section, configure the connection settings for your modem.
For a 3G or 4G modem, the telephone number is the access number specified by your wireless service provider. Examples of 3G and 4G access numbers are *99#, *99****1#, and #777. The settings for access point name, account name, domain, and password are not required for all 3G/4G modems. To establish a connection, some wireless service providers also require an Access Point Name (APN). To determine the requirements to configure your modem, contact your wireless service provider.
- Select the Account tab.
- Select the Enable 3G/4G modem support check box.
If a Telephone number is not already specified, when you select this check box, the Telephone number is set to *99#. - (Optional) In the Telephone number text box, type the access number required by your wireless service provider.
- If your wireless service provider has another access number, in the Alternate Telephone number text box, type that number.
- If your connection requires an APN, in the Access point name text box, type the APN required by your wireless service provider.
- If your wireless service provider requires them, type the Account name, Account domain, and Account password the modem must use to connect to your account.
For a serial modem, configure these settings.
- Select the Account tab.
- In the Telephone number text box, type the telephone number of your ISP.
- If your ISP has another telephone number, in the Alternate Telephone number text box, type that number.
- In the Account name text box, type your dial-up account name.
- If you log in to your account with a domain name, in the Account domain text box, type the domain name.
For example, msn.com. - In the Account password text box, type the password you use to connect to your dial-up account.
If you have problems with your connection, you can enable your Firebox to send detailed log messages to the event log file when a modem failover occurs. You can then review the debug log messages to find any errors.
On the Account tab, select the Enable modem and PPP debug trace check box.
DNS Settings
If your ISP or wireless service provider does not provide DNS server information, or if you must use a different DNS server, you can manually add the IP addresses for a DNS server.
- Select the DNS tab.
The DNS Settings page appears.
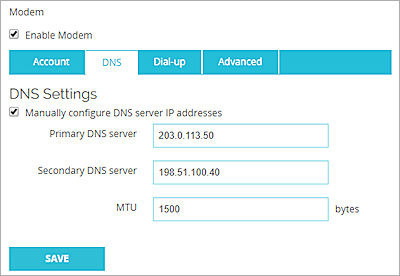
- Select the Manually configure DNS server IP addresses check box.
- In the Primary DNS server text box, type the IP address of the primary DNS server.
- If you have a secondary DNS server, in the Secondary DNS server text box, type the IP address for the secondary server.
- In the MTU text box, for compatibility purposes, you can set the Maximum Transmission Unit (MTU) to a different value. Most users can keep the default setting.
- Select the DNS tab.
The DNS Settings page appears.
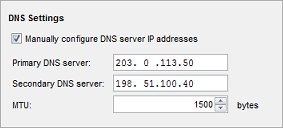
- Select the Manually configure DNS server IP addresses check box.
- In the Primary DNS server text box, type the IP address of the primary DNS server.
- If you have a secondary DNS server, in the Secondary DNS server text box, type the IP address for the secondary server.
- In the MTU text box, for compatibility purposes, you can set the Maximum Transmission Unit (MTU) to a different value. Most users can keep the default setting.
Dial-Up Settings
- Select the Dial Up tab.
The Dialing Options page appears.
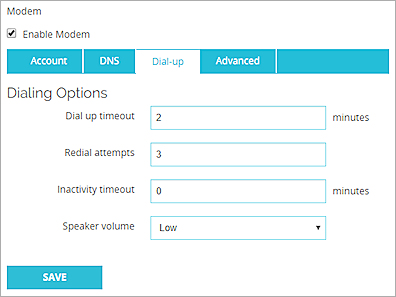
- In the Dial up timeout text box, type or select the number of seconds before a timeout occurs if your modem does not connect. The default value is two (2) minutes.
- In the Redial attempts text box, type or select the number of times the Firebox tries to redial if your modem does not connect. The default value is three (3) connection attempts.
- In the Inactivity timeout text box, type or select the number of minutes to wait if no traffic goes through the modem before a timeout occurs. The default value is no timeout (0 minutes).
- From the Speaker volume drop-down list, select the speaker volume for your modem.
- Select the Dial Up tab.
The Dialing Options page appears.
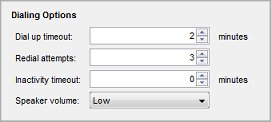
- In the Dial up timeout text box, type or select the number of seconds before a timeout occurs if your modem does not connect. The default value is two (2) minutes.
- In the Redial attempts text box, type or select the number of times the Firebox tries to redial if your modem does not connect. The default value is three (3) connection attempts.
- In the Inactivity timeout text box, type or select the number of minutes to wait if no traffic goes through the modem before a timeout occurs. The default value is no timeout (0 minutes).
- From the Speaker volume drop-down list, select the speaker volume for your modem.
Advanced Settings
Some dial-up ISPs or wireless service providers require that you specify one or more PPP options before you can connect. In China, for example, some ISPs require that you use the PPP option receive-all. The receive-all option forces PPP to accept all control characters from the peer.
- Select the Advanced tab.
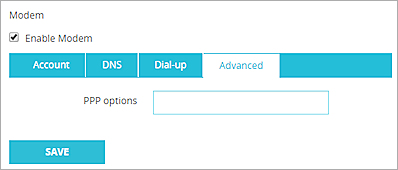
- In the PPP options text box, type the required PPP options.
To specify more than one PPP option, separate each option with a comma.
- Select the Advanced tab.
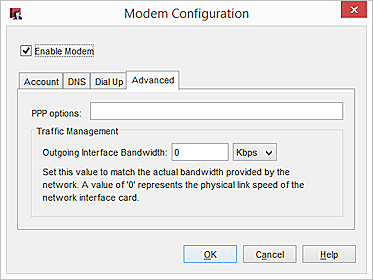
- In the PPP options text box, type the required PPP options.
To specify more than one PPP option, separate each option with a comma.
Link Monitor
In Fireware v12.1 and higher, the link monitor settings appear in the multi-WAN settings. For information about link monitor configuration, see Configure a Link Monitor Host.
In Fireware v12.0.2 and lower, the link monitor settings appear in the modem configuration settings. For information about how to configure link monitor in Fireware v12.0.2 and lower, see Configure Modem Failover in Fireware v12.0.2 and lower in the WatchGuard Knowledge Base.