Deployment Overview
This document describes how to set up AuthPoint multi-factor authentication (MFA) for Active Directory users that use Mobile VPN with L2TP.
If the L2TP VPN client is only used by local AuthPoint users, you do not have to configure Microsoft NPS or enable MS–CHAPv2. NPS is only required for users synced from Active Directory or an LDAP database.
Your Firebox must already be configured and deployed before you set up MFA with AuthPoint.
AuthPoint supports RADIUS authentication with PAP and MS-CHAPv2. 802.1x authentication is not supported.
Integration Summary
The hardware and software used in this guide include:
- Firebox with Fireware v12.8.2 or higher
- AuthPoint Gateway v7.0.1 or higher
- Windows Server 2019 with Microsoft Network Policy Server (NPS) and Active Directory Domain Services
WatchGuard Firebox Authentication Data Flow with AuthPoint
AuthPoint communicates with various cloud-based services and service providers with the RADIUS protocol. This diagram shows the data flow of an MFA transaction for the Mobile VPN with L2TP client.

Before You Begin
Before you begin these procedures, make sure that:
- You have installed and configured the v7.0.1 or higher of the AuthPoint Gateway (see About Gateways)
- You have installed and configured Active Directory Domain Services
- You have installed Network Policy and Access Services, which includes Network Policy Server (NPS)
Configure Microsoft NPS Server
To enable users synced from Active Directory to successfully authenticate with MS-CHAPv2, you must configure Microsoft Network Policy Server (NPS). NPS is required to validate the user credentials from MS-CHAPv2 RADIUS requests against Active Directory.
For instructions to configure Active Directory Domain Services, see the Microsoft documentation for Active Directory.
If the L2TP VPN client is only used by local AuthPoint users, you do not have to configure Microsoft NPS. Continue to the Configure the Firebox section.
Add a RADIUS Client in NPS
- On the Windows server, run Server Manager.
- Select Tools > Network Policy Server.
The Network Policy Server console appears. - Select RADIUS Clients and Servers > RADIUS Clients.
- Right-click RADIUS Clients and select New.
The New RADIUS Client window appears. - In the Friendly name text box, type a name.
- In the Address (IP or DNS) text box, type the IP address of the AuthPoint Gateway. In our example, the IP address of the AuthPoint Gateway is 192.168.100.20.
- In the Shared secret and Confirm shared secret text boxes, type a shared secret key. This key is used to communicate with the RADIUS server (AuthPoint Gateway).
You must use the same shared secret key when you configure your Firebox in the Configure the Firebox section and your RADIUS client resource in the Add a RADIUS Client Resource in AuthPoint section.
- Click OK.


Configure Connection Request Polices
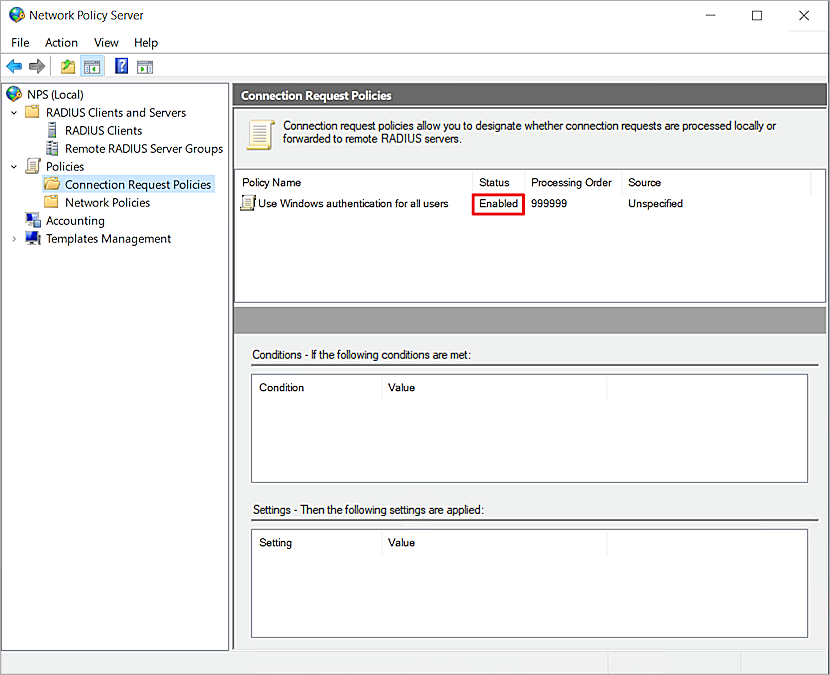
- Select Polices > Connection Request Policies. Make sure the default policy is enabled.
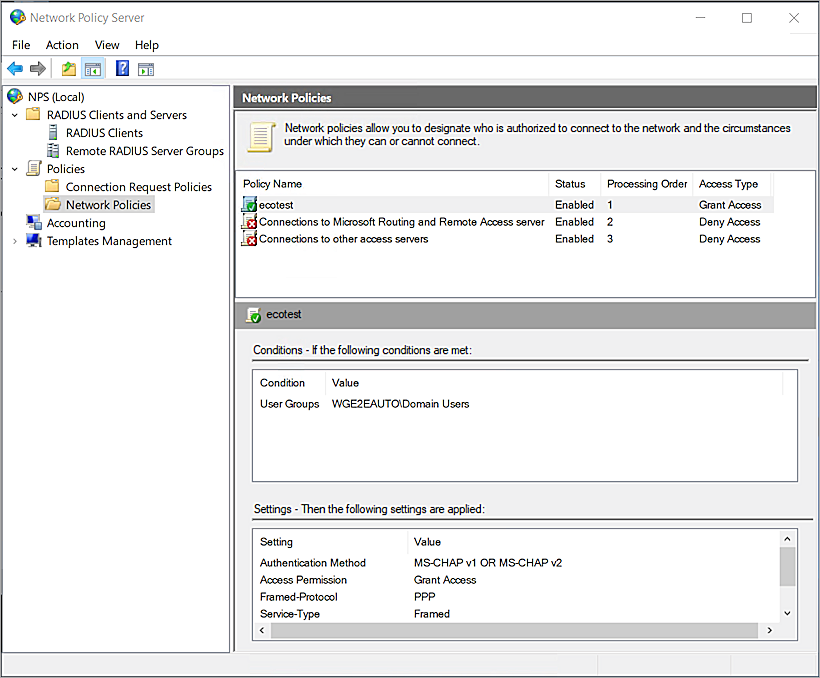
- Right-click Network Policies and select New.
The New Network Policy window appears. - In the Policy Name text box, type a name for this policy. In our example, we type ecotest.
- Click Next.
- In the Specify Conditions section, click Add.
- Select User Groups. Click Add > Add Groups.
- In the Enter the object name to select text box, type the group name. The name of this group must match the name of the Active Directory group your users belong to.
- Click OK.
- Click OK.
- Click Next twice.
- In the Configure Authentication Methods section, clear the User can change password after it has expired check box.
- Click Next.
- Click Next twice.
- In the Configure Settings section, click Add. In our example we use group authentication. If you want to use user authentication, skip Steps 15-21.
- From the Attributes list, select Filter-Id. Click Add.
- Click Add.
- In the Attribute Information window, type a group name in the text box. The name of this group must match the name of the Active Directory group your users belong to.
- Click OK.
- Click OK.
- Click Close.
- Click Next.
- Click Finish.
- Right-click NPS (Local) and select Register server in Active Directory.
- Click OK.
- Click OK.


Configure the Firebox
You must configure the RADIUS authentication settings and enable Mobile VPN with L2TP on your Firebox.
Configure RADIUS Authentication
When a user authenticates with AuthPoint MFA, AuthPoint does not send a response to the Firebox until the user approves the push notification that is sent to them or until the push authentication expires.
When you configure the RADIUS authentication server, the timeout value must be greater than the combined push timeout for AuthPoint (60 seconds) and NPS (30 seconds). With the default settings on RADIUS authentication server, if a user does not approve the push notification that is sent to them within 30 seconds (3 tries, 10 seconds each), the Firebox will fail over to another radius server, even though the current server is not down.
- Log in to Fireware Web UI (https://<your firebox IP address>:8080).
- Select Authentication > Servers.
The Authentication Servers page appears.
- From the Authentication Servers list, click RADIUS.
The RADIUS page appears. - Click Add.
The Add page appears. - In the Domain Name text box, type a name for this RADIUS server. Users must specify this domain name on the user login page. You cannot change the domain name after you save the settings.
- In the Primary Server Settings section, select the Enable RADIUS Server check box.
- In the IP Address text box, type the IP address of the RADIUS server (AuthPoint Gateway). In our example, the IP address of the AuthPoint Gateway is 192.168.100.20.
- In the Port text box, leave the default port setting of 1812. This is the default port used for communication with the RADIUS server (AuthPoint Gateway).
If you already have a RADIUS server installed that uses port 1812, or if NPS and the Gateway are installed on the same server, you must use a different port for the AuthPoint Gateway.
- In the Shared Secret and Confirm Secret text boxes, type the shared secret key that you specified in the Configure Microsoft NPS Server section. This is the password that the RADIUS server (AuthPoint Gateway) and the RADIUS client (Firebox) will use to communicate.
- In the Timeout text box, type 90.
- Leave the default value for Group Attribute.
- Click Save.

Configure Mobile VPN with L2TP
- Select VPN > Mobile VPN.
- In the L2TP section, click Manually Configure.
- Select the Activate Mobile VPN with L2TP check box.
- Select the Authentication tab.
- In the Authentication Server section, from the drop-down list, select the authentication server you created. Click Add.
- To make your authentication server the default authentication server, in the Authentication Server list, select your authentication server and click Move Up to move it to the top of the list.
Mobile VPN with L2TP uses the default authentication server unless a user specifies an authentication server as part of the user name when they authenticate from an L2TP client.If you have an L2TP VPN client configured and you only want to test AuthPoint MFA, do not make your authentication server the default.
- In the Users and Groups section, from the Create new drop-down list, select the authentication server you created.
- From the adjacent drop-down list, select Group.
You can add a user or a group. In our example, we add a group.
- Click Add.
The Add User or Group window appears. - For Type, select Group.
- In the Name text box, type a name for the group. The name of this group must match the Active Directory group your users belong to.
If you add a user, the name of the user must match the name of the AuthPoint user or Active Directory user.
- From the Authentication Server drop-down list, select your authentication server.
- Click Save.
- Select the IPSec tab.
- Select the Enable IPSec check box.
- In the Credential Method section, select Use Pre-Shared Key.
- In the adjacent text box, type a pre-shared key. You must specify this same key when you configure the VPN client.
- Click Save.


Configure AuthPoint
Before AuthPoint can receive authentication requests from the Firebox, you must:
- Specify the Firebox as a RADIUS client resource in AuthPoint. In AuthPoint, resources are the applications and services that your users connect to.
- Add an authentication policy for the Firebox RADIUS client resource or add the Firebox RADIUS client resource to an existing authentication policy. Authentication policies specify which resources users can authenticate to and which authentication methods they can use (Push, QR code, and OTP).
- Bind the Firebox RADIUS client resource to the AuthPoint Gateway.
Add a RADIUS Client Resource in AuthPoint
From the AuthPoint management UI:
- From the navigation menu, select Resources.
Click Add Resource.
The Add Resource page opens.

- From the Type drop-down list, select RADIUS Client.
Additional fields appear.

- In the Name text box, type a descriptive name for the resource.
- In the RADIUS client trusted IP or FQDN text box, type the Trusted IP address of your Firebox.
- Leave the default value in the Value sent for RADIUS attribute 11 (Filter-Id) drop-down list. This setting is not supported for MS-CHAPv2 authentication requests made by Active Directory users.
- In the Shared Secret text box, type the shared secret key that you specified in the Configure Microsoft NPS Server and Configure RADIUS Authentication section. This is the password that the RADIUS server (AuthPoint Gateway) and the RADIUS client (Firebox) will use to communicate.
- To configure the RADIUS client resource to accept MS-CHAPv2 authentication requests, click the Enable MS-CHAPv2 toggle.
Additional fields appear.If the L2TP VPN client is only used by local AuthPoint users, you do not have to enable MS–CHAPv2. Continue to Step 11.
- In the NPS RADIUS Server trusted IP or FQDN text box, type the IP address or fully qualified domain name (FQDN) of the NPS RADIUS server.
- In the Port text box, type 1812.
If NPS and the Gateway are installed on the same server, the port that the Gateway uses to communicate with NPS must be different than the port that the Gateway uses to communicate with the RADIUS client.
- In the Timeout In Seconds text box, type 30.
- Click Save.

Add a Group in AuthPoint
You must have at least one user group in AuthPoint to configure MFA. If you already have a group, you do not have to add another group.
To add a WatchGuard Cloud-hosted group to the WatchGuard Cloud Directory:
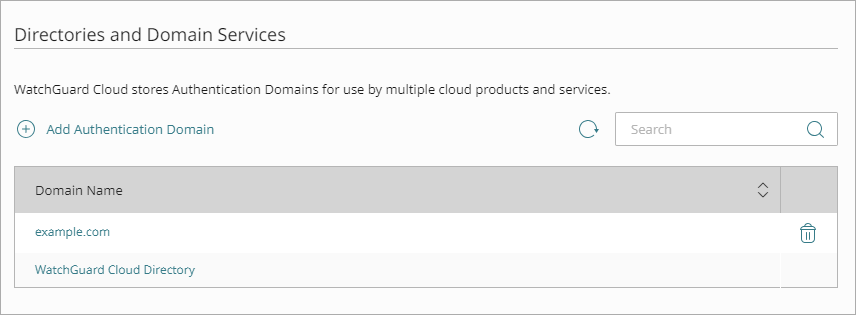
- Go to Configure > Directories and Domain Services.
- Click the WatchGuard Cloud Directory domain name. If you have not yet added the WatchGuard Cloud Directory, click Add Authentication Domain and select the WatchGuard Cloud Directory.
The New Group page appears.
- In the Groups tab, click Add Group.
- In the Group Name text box, type a descriptive name for the group.
- (Optional) In the Description text box, type a description of the group.
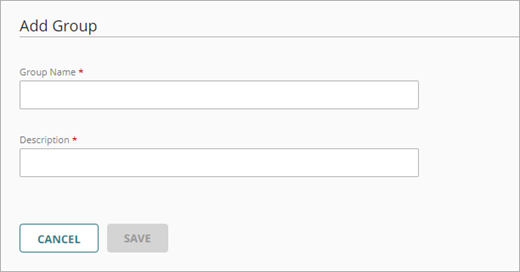
- Click Save.
Your group is added to the WatchGuard Cloud Directory and to AuthPoint.
Add an Authentication Policy to AuthPoint
Authentication policies specify which resources users can authenticate to and which authentication methods they can use (Push, QR code, and OTP). In this case, authenticate AD user with L2TP only support Push.
You must have at least one authentication policy in AuthPoint that includes the Firebox resource. If you already have authentication policies, you do not have to create a new authentication policy. You can add this resource to your existing authentication policies.
Users that do not have an authentication policy for a specific resource cannot authenticate to log in to that resource.
To configure an authentication policy:
- From the navigation menu, select Authentication Policies.
- Click Add Policy.

- Type a name for this policy.
- From the Select the authentication options drop-down list, select Authentication options and select the Password and Push check boxes.
QR code authentication is not supported for RADIUS client resources. OTP authentication is not supported for RADIUS client resources with MS-CHAPv2 enabled.

- Select which groups this policy applies to. You can select more than one group. To configure this policy to apply to all groups, select All Groups.
- Select the resource that you created in the previous section. If you want this policy to apply to additional resources, select each resource this policy applies to. To configure this policy to apply to all resources, select All Resources.

-
(Optional) If you have configured policy objects such as a Network Location, select which policy objects apply to this policy. When you add a policy object to a policy, the policy only applies to user authentications that match the conditions of the policy objects. For example, if you add a Network Location to a policy, the policy only applies to user authentications that come from that Network Location. Users who only have a policy that includes a Network Location do not get access to the resource when they authenticate outside of that Network Location (because they do not have a policy that applies, not because authentication is denied).
For RADIUS authentication, policies that have a Network Location do not apply because AuthPoint does not have the IP address of the user.
If you configure policy objects, we recommend that you create a second policy for the same groups and resources without the policy objects. The policy with the policy objects should have a higher priority.

- Click Save.
Your policy is created and added to the end of the policy list.When you create a new policy, we recommend that you review the order of your policies. AuthPoint always adds new policies to the end of the policy list.

Bind the RADIUS Resource to a Gateway
To use RADIUS authentication with AuthPoint, you must have the AuthPoint Gateway installed on your corporate network and you must assign your RADIUS resources to the Gateway in the AuthPoint management UI. The Gateway functions as a RADIUS server.
If you have not already configured and installed the AuthPoint Gateway, see About Gateways.
To assign your RADIUS resources to the Gateway:
- From the navigation menu, select Gateway.
- Select the Name of the Gateway.
-
From the RADIUS section, in the Port text box, type the port number used to communicate with the Gateway. The default ports are 1812 and 1645.
If you already have a RADIUS server installed that uses port 1812 or 1645, you must use a different port for the AuthPoint Gateway.
- From the Select a RADIUS Resource drop-down list, select your RADIUS client resource.
- Click Save.
Sync Users to AuthPoint from Active Directory
You must create AuthPoint user accounts for your users. To sync users from Active Directory, you must add an LDAP external identity and create one or more queries.
In AuthPoint, LDAP external identities represent external user databases. They connect to user databases to get user account information and validate passwords. The queries you add to an external identity specify which users to sync from your Active Directory or LDAP database. They pull user information and create AuthPoint user accounts for the users that are found.
For detailed instructions to sync users from Active Directory, see Sync Users from Active Directory or LDAP.
Test the Integration
To test AuthPoint MFA with your L2TP VPN client, you authenticate with a mobile token on your mobile device. For RADIUS resources with MS-CHAPv2 enabled, you authenticate with a push notification (you receive a push notification in the mobile app that you must approve to authenticate).
- From a Windows 10 computer, select Settings.
- Select Network & Internet.
- Select VPN.
- Click Add a VPN connection.
The Add a VPN connection window opens. - From the VPN provider drop-down list, select Windows (built-in).
- In the Connection name text box, type a name. In our example, we type VPN-L2TP.
- In the Server name or address text box, type the Domain name or external IP address of the Firebox.
- From the VPN type drop-down list, select L2TP/IPsec with pre-shared key.
- From the Type of sign-in info drop-down list, select User name and password.
- Click Save.
The Add a VPN connection window closes. - In the Related Settings section, click Change adapter options.
- Right-click the name of the VPN you created and select Properties.
- Select the Security tab.
- From the Data encryption drop-down list, select Require encryption (disconnect if server declines).
- In the Authentication section, select Allow these protocols.
- Select Microsoft CHAP Version 2(MS-CHAP v2) as the only allowed protocol.
- Click Advanced settings.
- Select Use pre-shared key for authentication.
- In the Key text box, type the pre-shared key that you specified in the Configure Mobile VPN with L2TP section.
- Click OK to close the Advanced Properties and VPN Properties windows.
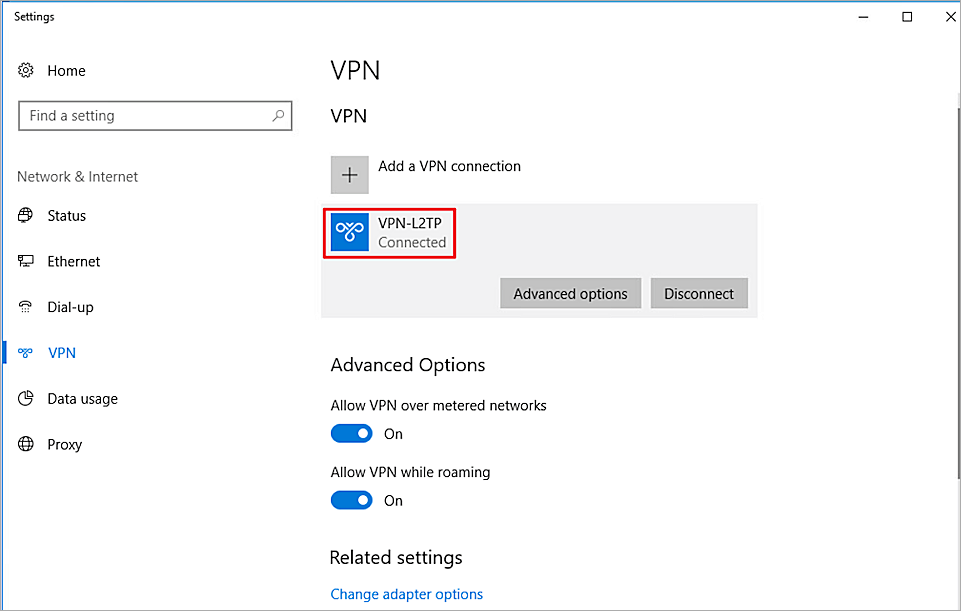
- Select the VPN you created. Click Connect.
- Type your user name and password.
- Approve the authentication request that is sent to your mobile device.
The VPN connects successfully.
See Also
Firebox Mobile VPN with IKEv2 Integration with AuthPoint for Active Directory Users