To monitor the status of interfaces on your Firebox, you can configure Link Monitor targets, which are remote hosts beyond your network perimeter. For detailed information about how Link Monitor works, and for best practices, go to About Link Monitor.
Different interface types have different Link Monitor default settings and requirements:
- External interfaces — The default target is the default gateway, which is the next hop after the Firebox. For meaningful performance data, we recommend that you replace the default gateway target with a different Link Monitor target.
- Internal interfaces (Fireware v12.4 or higher) — After you add an internal interface to Link Monitor, there is no default target. You must specify a next hop IP address or add a target. Internal interfaces are Trusted, Optional, or Custom interfaces.
- BOVPN virtual interfaces (Fireware v12.4 or higher) —The default target is the peer IP address. You cannot edit or remove this target, or add other targets.
If you specify a domain name in the settings for a target, you must configure a DNS server as described in Configure Network DNS and WINS Servers.
Add an Interface
- Select Network > Link Monitor.
The Link Monitor list appears.
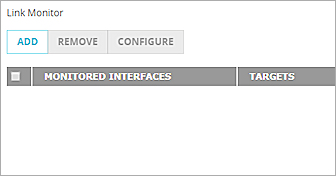
- Click Add.
The Add Link Monitor Interface dialog box appears.
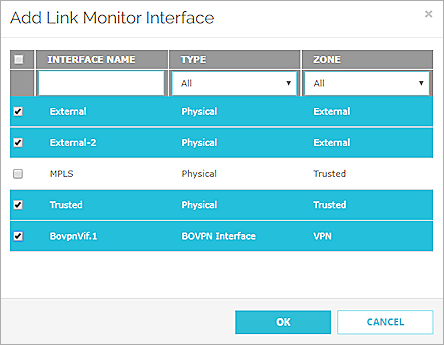
- Select one or more interfaces and click OK.
The interfaces appear in the list.
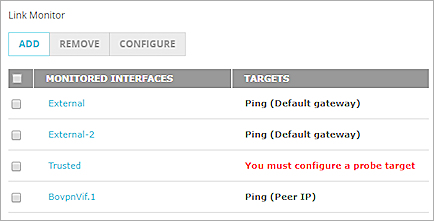
- (Recommended) If you added an external interface, add a custom target:
- Click the interface in the Link Monitor list.
The Link Monitor settings appear. - Click Add.
- Add a custom target.
The target you add replaces the default target.
- Click the interface in the Link Monitor list.
- If you added an internal interface, add a next hop, a custom target, or both:
- Click the interface in the Link Monitor list.
The Link Monitor settings appear. - To add a next hop, select the Next Hop check box and type an IP address.
- To add a custom target, click Add.
- Click the interface in the Link Monitor list.
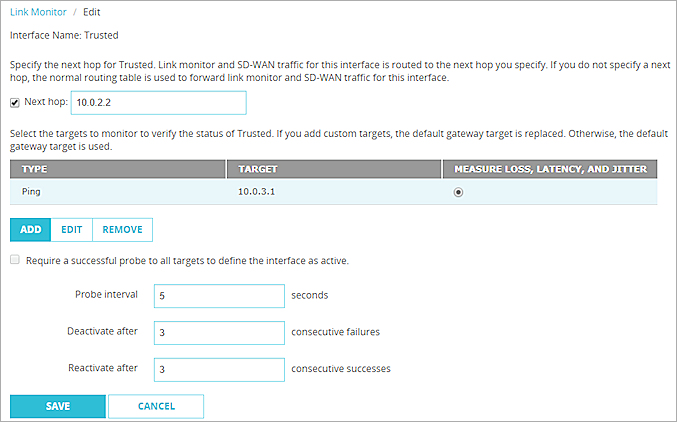
For information about how to configure targets, go to Edit the Link Monitor Configuration.
- Select Network > Configuration > Link Monitor.
The Link Monitor list appears.
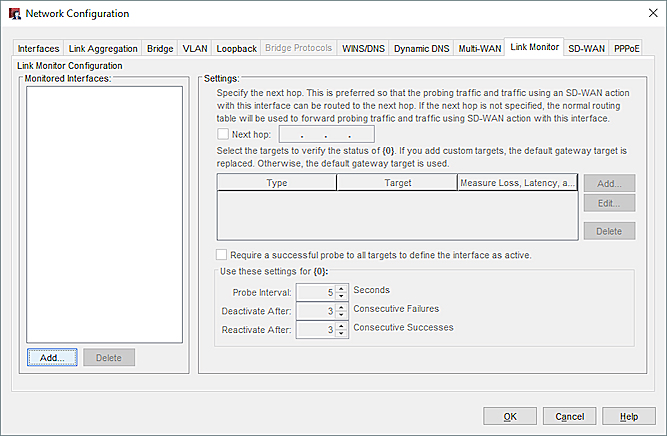
- Click Add.
The interface selection dialog box appears.
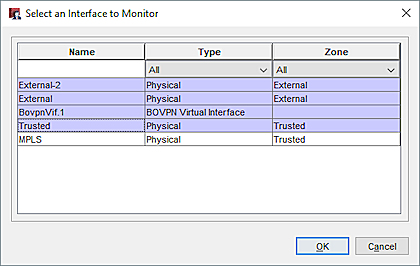
- Select one or more interfaces and click OK.
The interfaces that you added appear in the list.
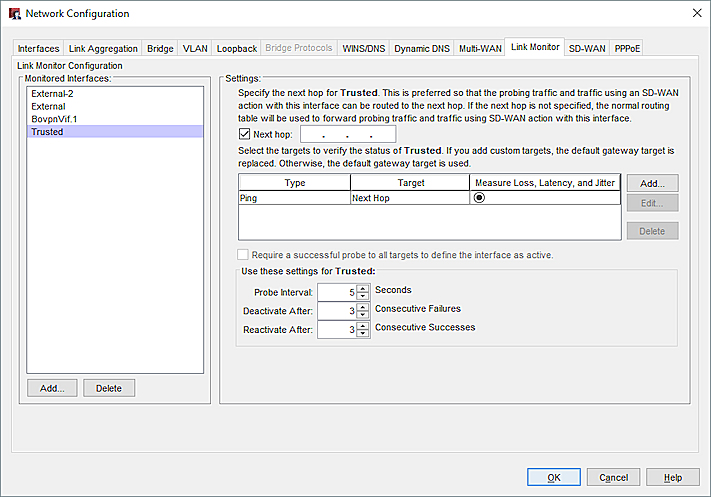
- (Recommended) If you added an external interface, add a custom target:
- Click the interface in the Link Monitor list.
The Link Monitor settings for that interface appear. - Click Add.
- Add a custom target.
The target you add replaces the default target.
- Click the interface in the Link Monitor list.
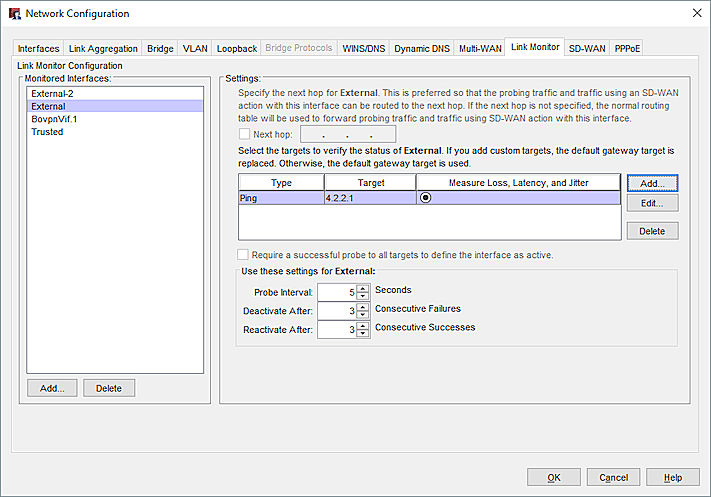
- If you added an internal interface, add a next hop, a custom target, or both:
- Click the interface in the Link Monitor list.
The Link Monitor settings appear. - To add a next hop, select the Next Hop check box and type an IP address.
- To add a custom target, click Add.
- Click the interface in the Link Monitor list.
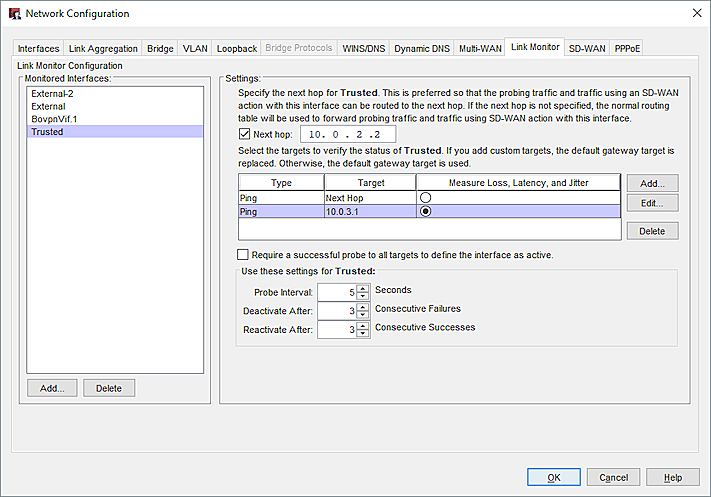
For information about how to configure targets, go to Edit the Link Monitor Configuration.
Edit the Link Monitor Configuration
- Select Network > Link Monitor.
The Link Monitor list appears. - Click the interface name.
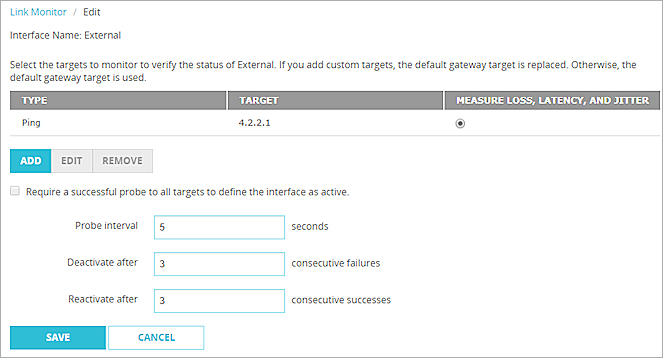
The Link Monitor settings appear. - To replace the default target, click Add.
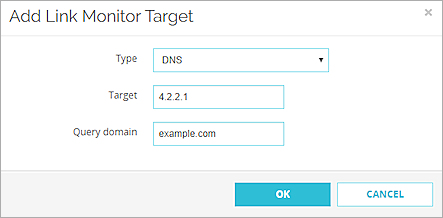
The Add Link Monitor Target dialog box appears.
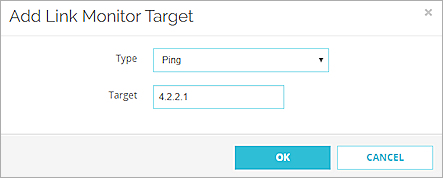
- From the Type drop-down list, select Ping, TCP, or DNS.
- In the Target text box, type an IP address or domain name.
- If you selected TCP, in the Port text box, type a port number.
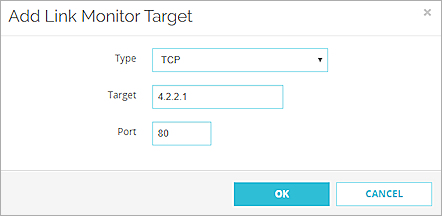
- If you selected DNS, type the IP address of the DNS server.
- If you selected DNS, in the Query Domain text box, type a domain name for the DNS server to resolve.
- Click OK.
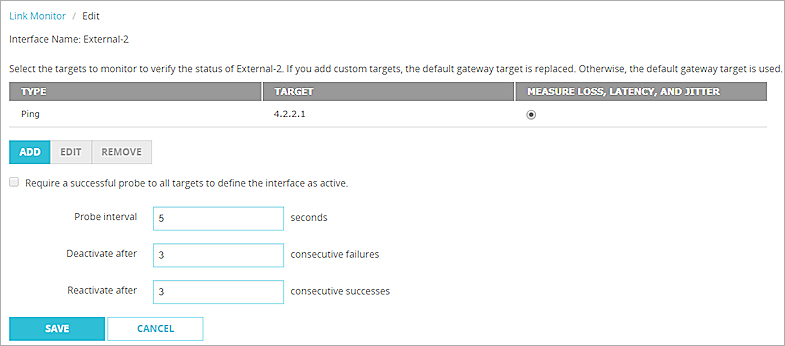
The target you configured replaces the default gateway target.
- To add up to two additional targets, repeat Steps 3–9. Tip!
- For one target in the list, select the radio button for Measure Loss, Latency, and Jitter.
If you select loss, latency, and jitter measures in an SD-WAN action, connections fail over if the values you specified for those measures are exceeded. For more information, go to About SD-WAN. - To require all Link Monitor targets to be successful to define the interface as active, select the Require a successful probe to all targets to define the interface as active check box.
- To specify how often the Firebox verifies the status of the interface, in the Probe interval text box, type or select the amount of time in seconds.
The default setting is 5 seconds. - To change the number of consecutive probe failures that must occur before failover to the next specified interface occurs, in the Deactivate after text box, type or select the number of failures.
The default setting is 3 failures. - To change the number of consecutive successful probes through an interface that must occur before an interface that was inactive can become active again, in the Reactivate after text box type or select the number of successful probes.
The default setting is 3 successes. - Click Save.
- Select Network > Configuration > Link Monitor.
The Link Monitor list appears. - From the Monitored Interfaces list, select an interface.
The settings for that interface appear. - To replace the default target, from the Settings section, click Add.
The Add Probing Target dialog box appears.
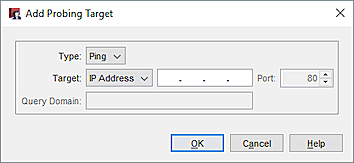
- From the Type drop-down list, select Ping, TCP, or DNS.
- In the Target text box, select IP Address or Domain.
- Type an IP address or domain name. If you selected DNS, type the IP address of the DNS server.
- If you selected TCP, in the Port text box, type a port number.
- If you selected DNS, in the Query Domain text box, type a domain name for the DNS server to resolve.
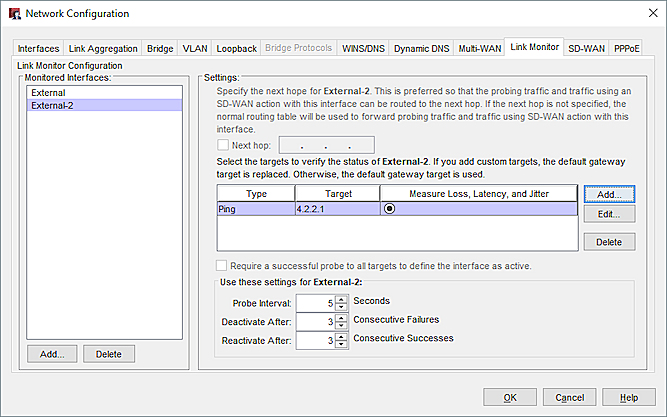
- Click OK. The target you configured replaces the default gateway target.
- To add up to two additional targets, repeat Steps 3–9. Tip!
- For one target in the list, select the radio button for Measure Loss, Latency, and Jitter.
If you select loss, latency, and jitter measures in an SD-WAN action, connections fail over if the values you specified for those measures are exceeded. For more information, go to About SD-WAN. - To require all Link Monitor targets to be successful to define the interface as active, select the Require a successful probe to all targets to define the interface as active check box.
- To specify how often the Firebox verifies the status of the interface, in the Probe interval text box, type or select the amount of time in seconds.
The default setting is 5 seconds. - To change the number of consecutive probe failures that must occur before failover to the next specified interface occurs, in the Deactivate after text box, type or select the number of failures.
The default setting is 3 failures. - To change the number of consecutive successful probes through an interface that must occur before an interface that was inactive can become active again, in the Reactivate after text box type or select the number of successful probes.
The default setting is 3 successes.
Configure Link Monitor in Fireware v12.3.x
In Fireware v12.3.x, the steps to enable and configure Link Monitor are different.
- Select Network > Link Monitor.
The Link Monitor list appears.

- Select an interface and click Configure.
The Link Monitor settings appear. - Select Enable Link Monitor for this interface.
- To add a Link Monitor other than the default gateway, click Add. Tip!
The Add Link Monitor Target dialog box appears. - From the Type drop-down list, select Ping, TCP, or DNS.
- In the Target text box, type an IP address or domain name.

- If you selected TCP, in the Port text box, type a port number.

- If you selected DNS, in the Target text box, type the IP address of the DNS server.
- In the Query Domain text box, type a domain name for the DNS server to resolve.

- Click OK. The target you configured replaces the default gateway target.

- To add more targets, repeat Steps 4–9. Tip!
- For one target in the list, select the radio button for Measure Loss, Latency, and Jitter.
If you select loss, latency, and jitter measures in an SD-WAN action, connections fail over if the values you specified for those measures are exceeded. For more information, go to About SD-WAN. - To require all link monitor targets to be successful to define the interface as active, select the Require a successful probe to all targets to define the interface as active check box.
- To specify how often the Firebox verifies the status of the interface, in the Probe interval text box, type or select the amount of time in seconds.
The default setting is 5 seconds. - To change the number of consecutive probe failures that must occur before failover to the next specified interface occurs, in the Deactivate after text box, type or select the number of failures.
The default setting is 3 failures. - To change the number of consecutive successful probes through an interface that must occur before an interface that was inactive can become active again, in the Reactivate after text box type or select the number of successful probes.
The default setting is 3 successes. - Repeat Steps 2–14 for each external interface.
- Click Save.
- Select Network > Configuration.
- Select the Link Monitor tab.
The Link Monitor Configuration settings appear.
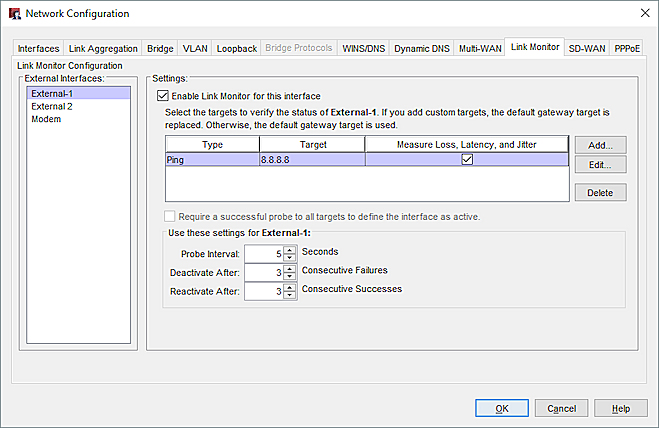
- From the External Interfaces list, select an interface.
- If the interface is a modem, and you want the modem interface to monitor the default gateway or another source that you specify, you must select the Enable Link Monitor for this interface check box.
This check box is not selected by default for modems. - To add a Link Monitor other than the default gateway, click Add. Tip!
The Add Probing Target dialog box appears.

- From the Type drop-down menu, select Ping, TCP, or DNS.
- In the Target text box, type an IP address or domain name.
- If you selected TCP, in the Port text box, type a port number.
- If you selected DNS, in the Query Domain text box, type a domain name.
- Click OK. The target you configured replaces the default gateway target.
- To add more targets, repeat Steps 4–10.
- For one target in the list, select the radio button for Measure Loss, Latency, and Jitter.
If you select loss, latency, and jitter measures in an SD-WAN action, connections fail over if the values you specified for those measures are exceeded. For more information, go to About SD-WAN. - To require all link monitor targets to be successful to define the interface as active, select the Require a successful probe to all targets to define the interface as active.check box.
- To specify how often the Firebox verifies the status of the interface, in the Probe Interval text box, type or select the amount of time in seconds.
The default setting is 5 seconds. - To change the number of consecutive probe failures that must occur before failover to the next specified interface occurs, in the Deactivate After text box, type or select the number of failures.
The default setting is 3 failures. - To change the number of consecutive successful probes through an interface that must occur before an interface that was inactive can become active again, in the Reactivate After text box type or select the number of successful probes.
The default setting is 3 successes. - Repeat Steps 3–15 for each external interface.
- Click OK.
- Save the Configuration File.
Configure Link Monitor in Fireware v12.2.1 or Lower
In Fireware v12.2.1 or lower, link monitor settings appear in the multi-WAN configuration, and you must enable multi-WAN to configure link monitor targets. You can configure up to two link monitor targets for an interface.
To configure link monitor targets in Fireware v12.2.1 or lower, go to Configure Link Monitor in the Fireware v12.2.1 or lower in the WatchGuard Knowledge Base.