Applies To: WatchGuard Advanced EPDR, WatchGuard EPDR, WatchGuard EDR,WatchGuard EDR Core, WatchGuard EPP
The instructions in this topic were successfully used to deploy WatchGuard Endpoint Security with Intune profiles in our test lab. Your environment might have different requirements or limitations. If you encounter any issues, contact your Microsoft Intune Support representative for assistance.
Microsoft Intune is a cloud-based unified endpoint management service that simplifies app and device management across your devices. This topic describes the steps to create configuration policies for Mac devices in Microsoft Intune and then deploy the configuration to the WatchGuard Agent and protection software on your Mac devices. When you use Intune, you automate acceptance of the permissions required for the endpoint security software to work on the Mac device.
We recommend that you create the configuration in Intune first so that when the endpoint security protection is installed on your device, it already has the required permissions.
These permissions are required to create and deploy Endpoint Security for macOS with Intune configuration policies. You can create these policies and scripts to automate installation of WatchGuard Endpoint Security on your Mac devices:
- Create a Policy to Enable Full Disk Access
- Create a Policy to Enable the Login Item to Run in Background
- Create a Policy to Allow System and Network Extensions
- Create a Policy to Automatically Allow the Content Filter
- Create a Script to Prevent Network Access Alerts
After you create the policies and scripts, you must Deploy the InTune Configuration Policies.
Before You Begin
Before you create the configuration in Intune, we recommend that you create a group for all Mac devices in the Endpoint Security management UI, or for the Macs you want to assign the configuration to. When you install the WatchGuard Agent, the profiles only apply to the recipient Mac devices.
For maximum compatibility, we strongly recommend that you use Macs that run macOS Catalina 10.15 and higher. We also require that the Mac devices have the latest version of WatchGuard Endpoint Security installed.
Mac devices with macOS Mojave 10.14 and lower run WatchGuard Endpoint Security v2.x and lower. The steps for these devices are not included in this topic.
Create a Policy to Enable Full Disk Access
Full disk access on the Mac is required for the endpoint security protection service.
To enable full disk access, from the Intune Admin Center:
- From the left panel, select Devices.
- Select macOS.
- Select Configuration.
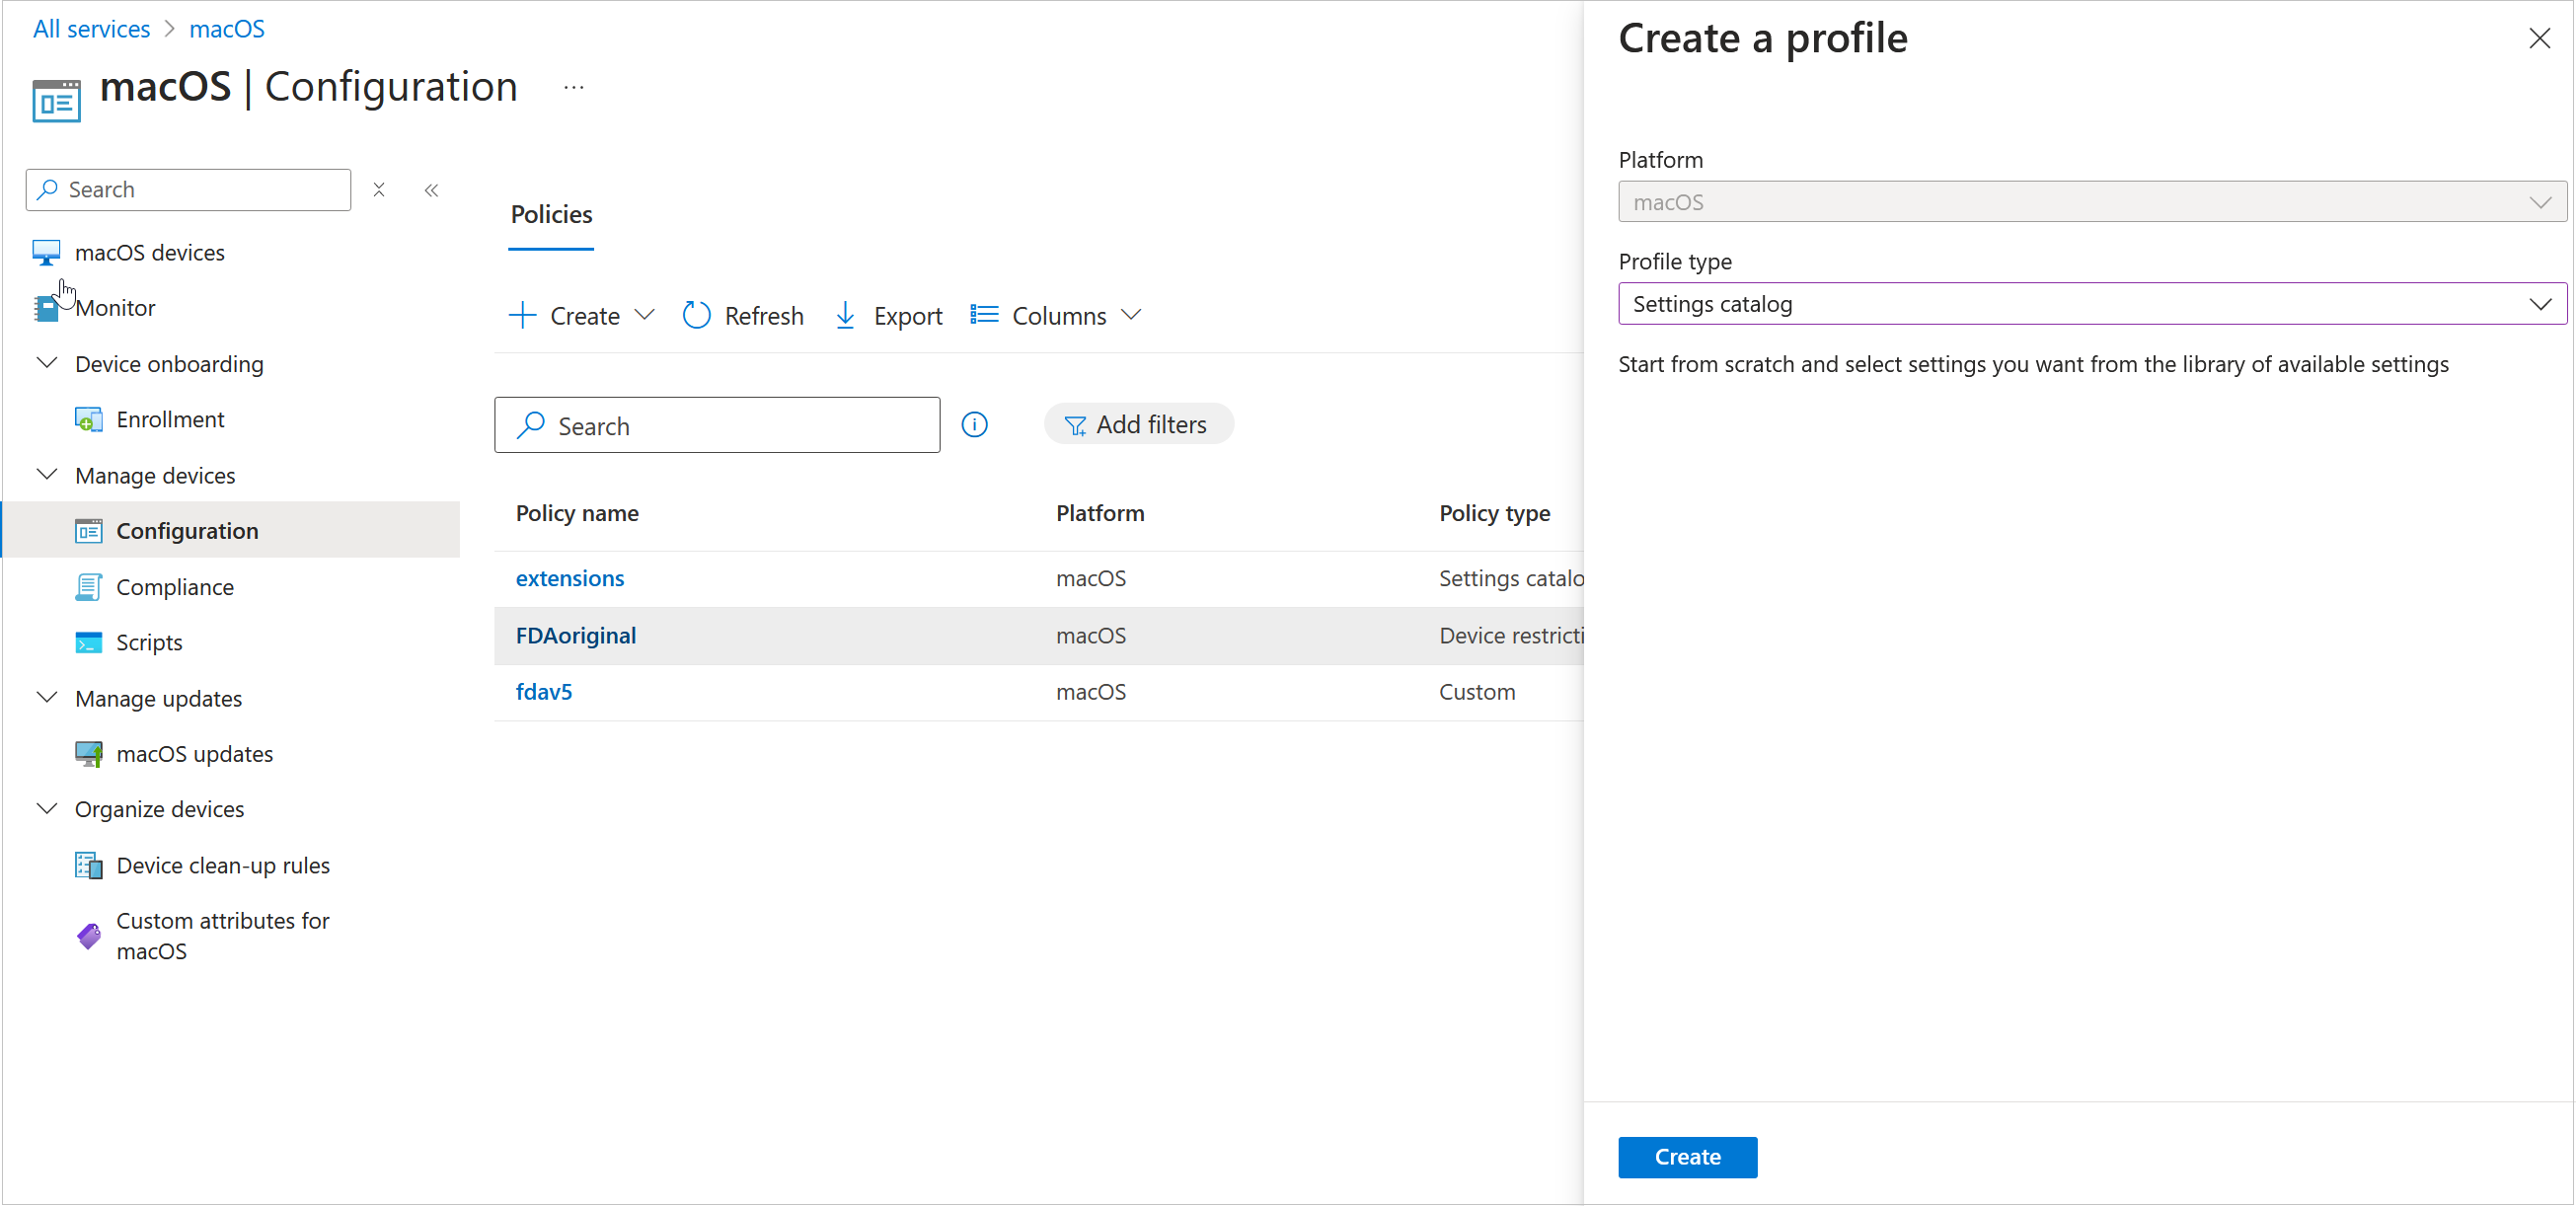
- Click Create > New Policy.
The Create a Profile page opens. - From the Profile Type drop-down list, select Templates.

- For the Template Name list, select Device Restrictions.
- Click Create.
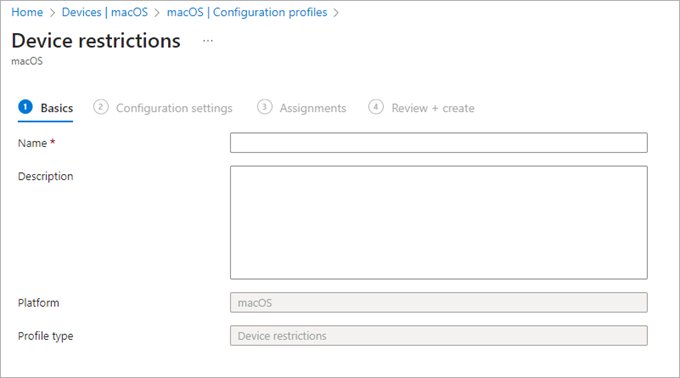
- Enter a Name for the template (for example, type FDA). Click Next.
- In the Configuration Settings page, expand Privacy Preferences.
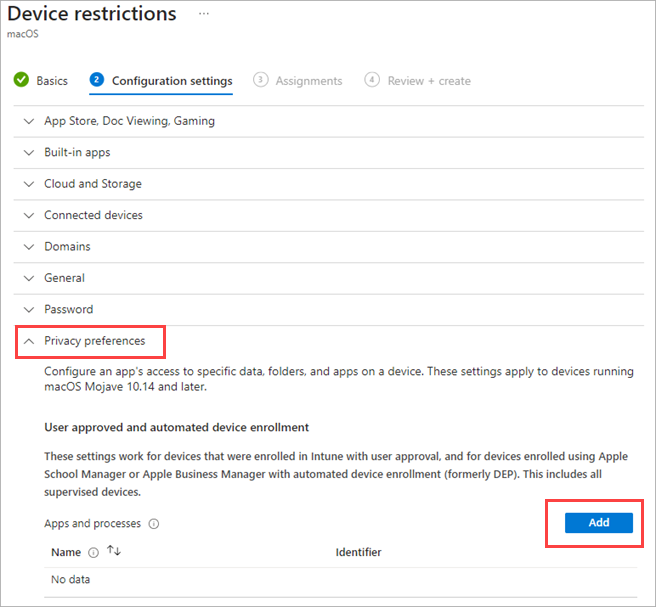
- Click Add.
- Specify the privacy preferences:
- Name: com.protection.agent
- Identifier Type: Bundle ID
- Identifier: com.protection.agent
- In the Code Requirement box, enter this code:
identifier "com.protection.agent" and anchor apple generic and certificate 1[field.1.2.840.113635.100.6.2.6] /* exists / and certificate leaf[field.1.2.840.113635.100.6.1.13] / exists */ and certificate leaf[subject.OU] = D3U2N4A6J7
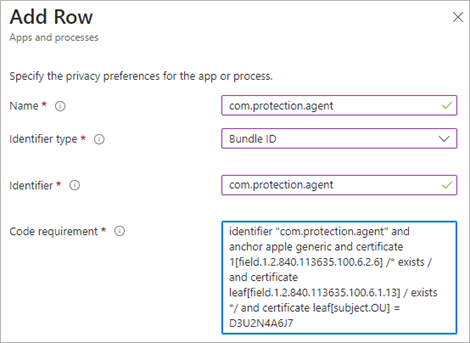
- From the Full Disk Access drop-down list, select Allow.
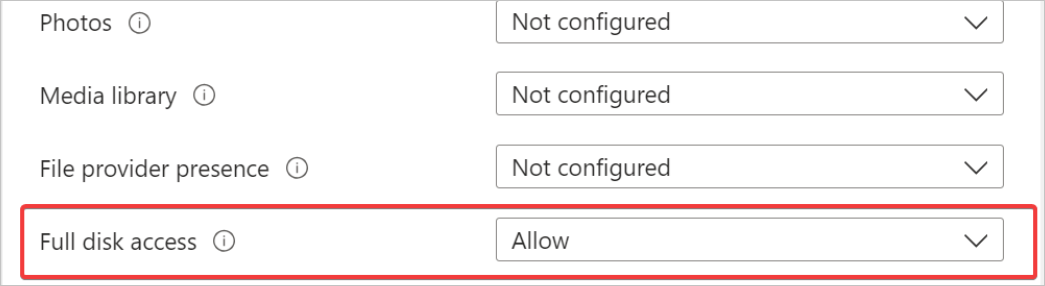
- Click Save.
- Click Next.
- In the Assignments page, select the group of devices that you want to assign this profile to.
- Click Next.
- Review the profile for completeness. Click Previous if you want to return to a previous step.
- Click Create to create the policy.
Create a Policy to Enable the Login Item to Run in Background
The Login Item – Allow run in background permission is required for Mac devices with macOS Ventura 13.x and macOS Sonoma 14.x. You can also assign it to Mac devices with a higher OS (for example, Catalina, Big Sur, and Monterey).
To enable the login item to run in background, from the Intune Admin Center:
- From the left panel, select Devices.
- Select macOS.
- Select Configuration.
- Click Create > New Policy.
The Create a Profile page opens. - From the Profile Type drop-down list, select Settings Catalog.

- Click Create.
- Enter a Name for the profile (for example, type Run in Background).
- Click Next.
- In the Configuration Settings page, click Add Settings.
- Expand the Login section.
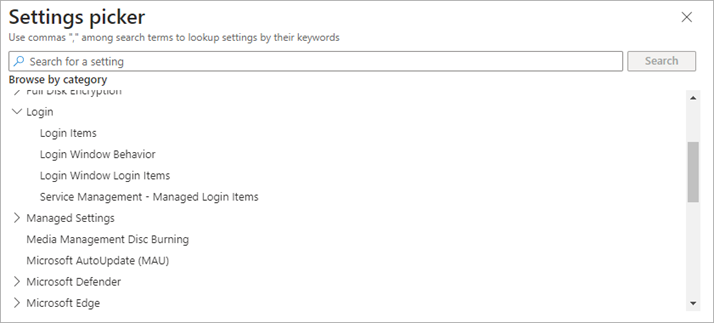
- Select Service Management – Managed Login Items.
- Select the Rules check box.
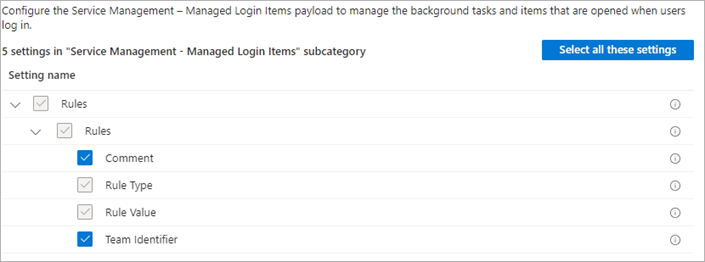
- In the left pane, click Add to add a new rule, or select the check box for an existing row.

- Click Edit Instance.

- Add this information for the instance:
Comment: Run in background
Rule Type: bundle identifier
Rule Value: com.protection.agent.service
Team Identifier: D3U2N4A6J7
- Click Save.
- In the Assignments page, select the group of devices that you want to assign this profile to.
- Click Next.
- Review the profile for completeness. Click Previous if you want to return to a previous step.
- Click Create to create the profile.
Create a Policy to Allow System and Network Extensions
System extensions are required to capture file events. Network extensions are required to capture and filter network packets for web protection and content filtering. In the protection software v3.04 and higher, network extensions are also required for device isolation.
You can create a single profile to allow both system and network extensions on the Mac.
To configure allowed system and network extensions, from the Intune Admin Center:
- From the left panel, select Devices.
- Select macOS.
- Select Configuration.
- Click Create > New Policy.
The Create a Profile page opens. - From the Profile Type drop-down list, select Settings Catalog.
- Click Create.
- Enter a Name for the profile (for example, type Allowed Extensions).
- Click Next.
- Click Add Settings.
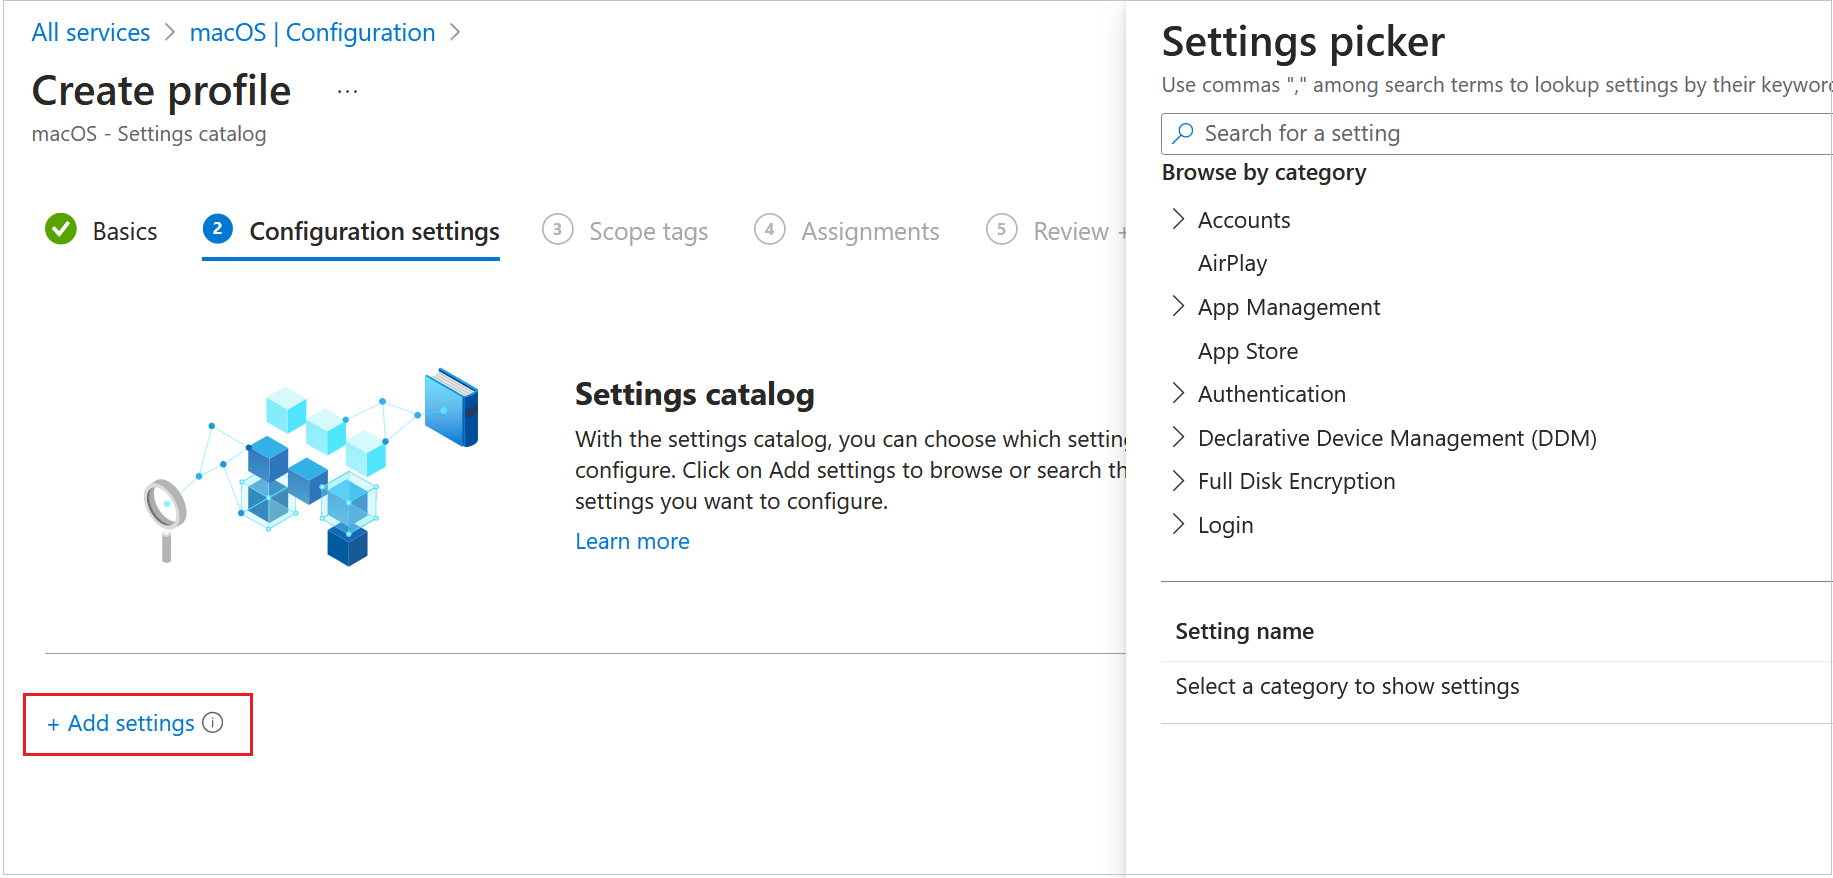
- In the Settings Picker, select System Configuration > System Extensions.
- In the Setting Name section, select the Allowed System Extensions check box.
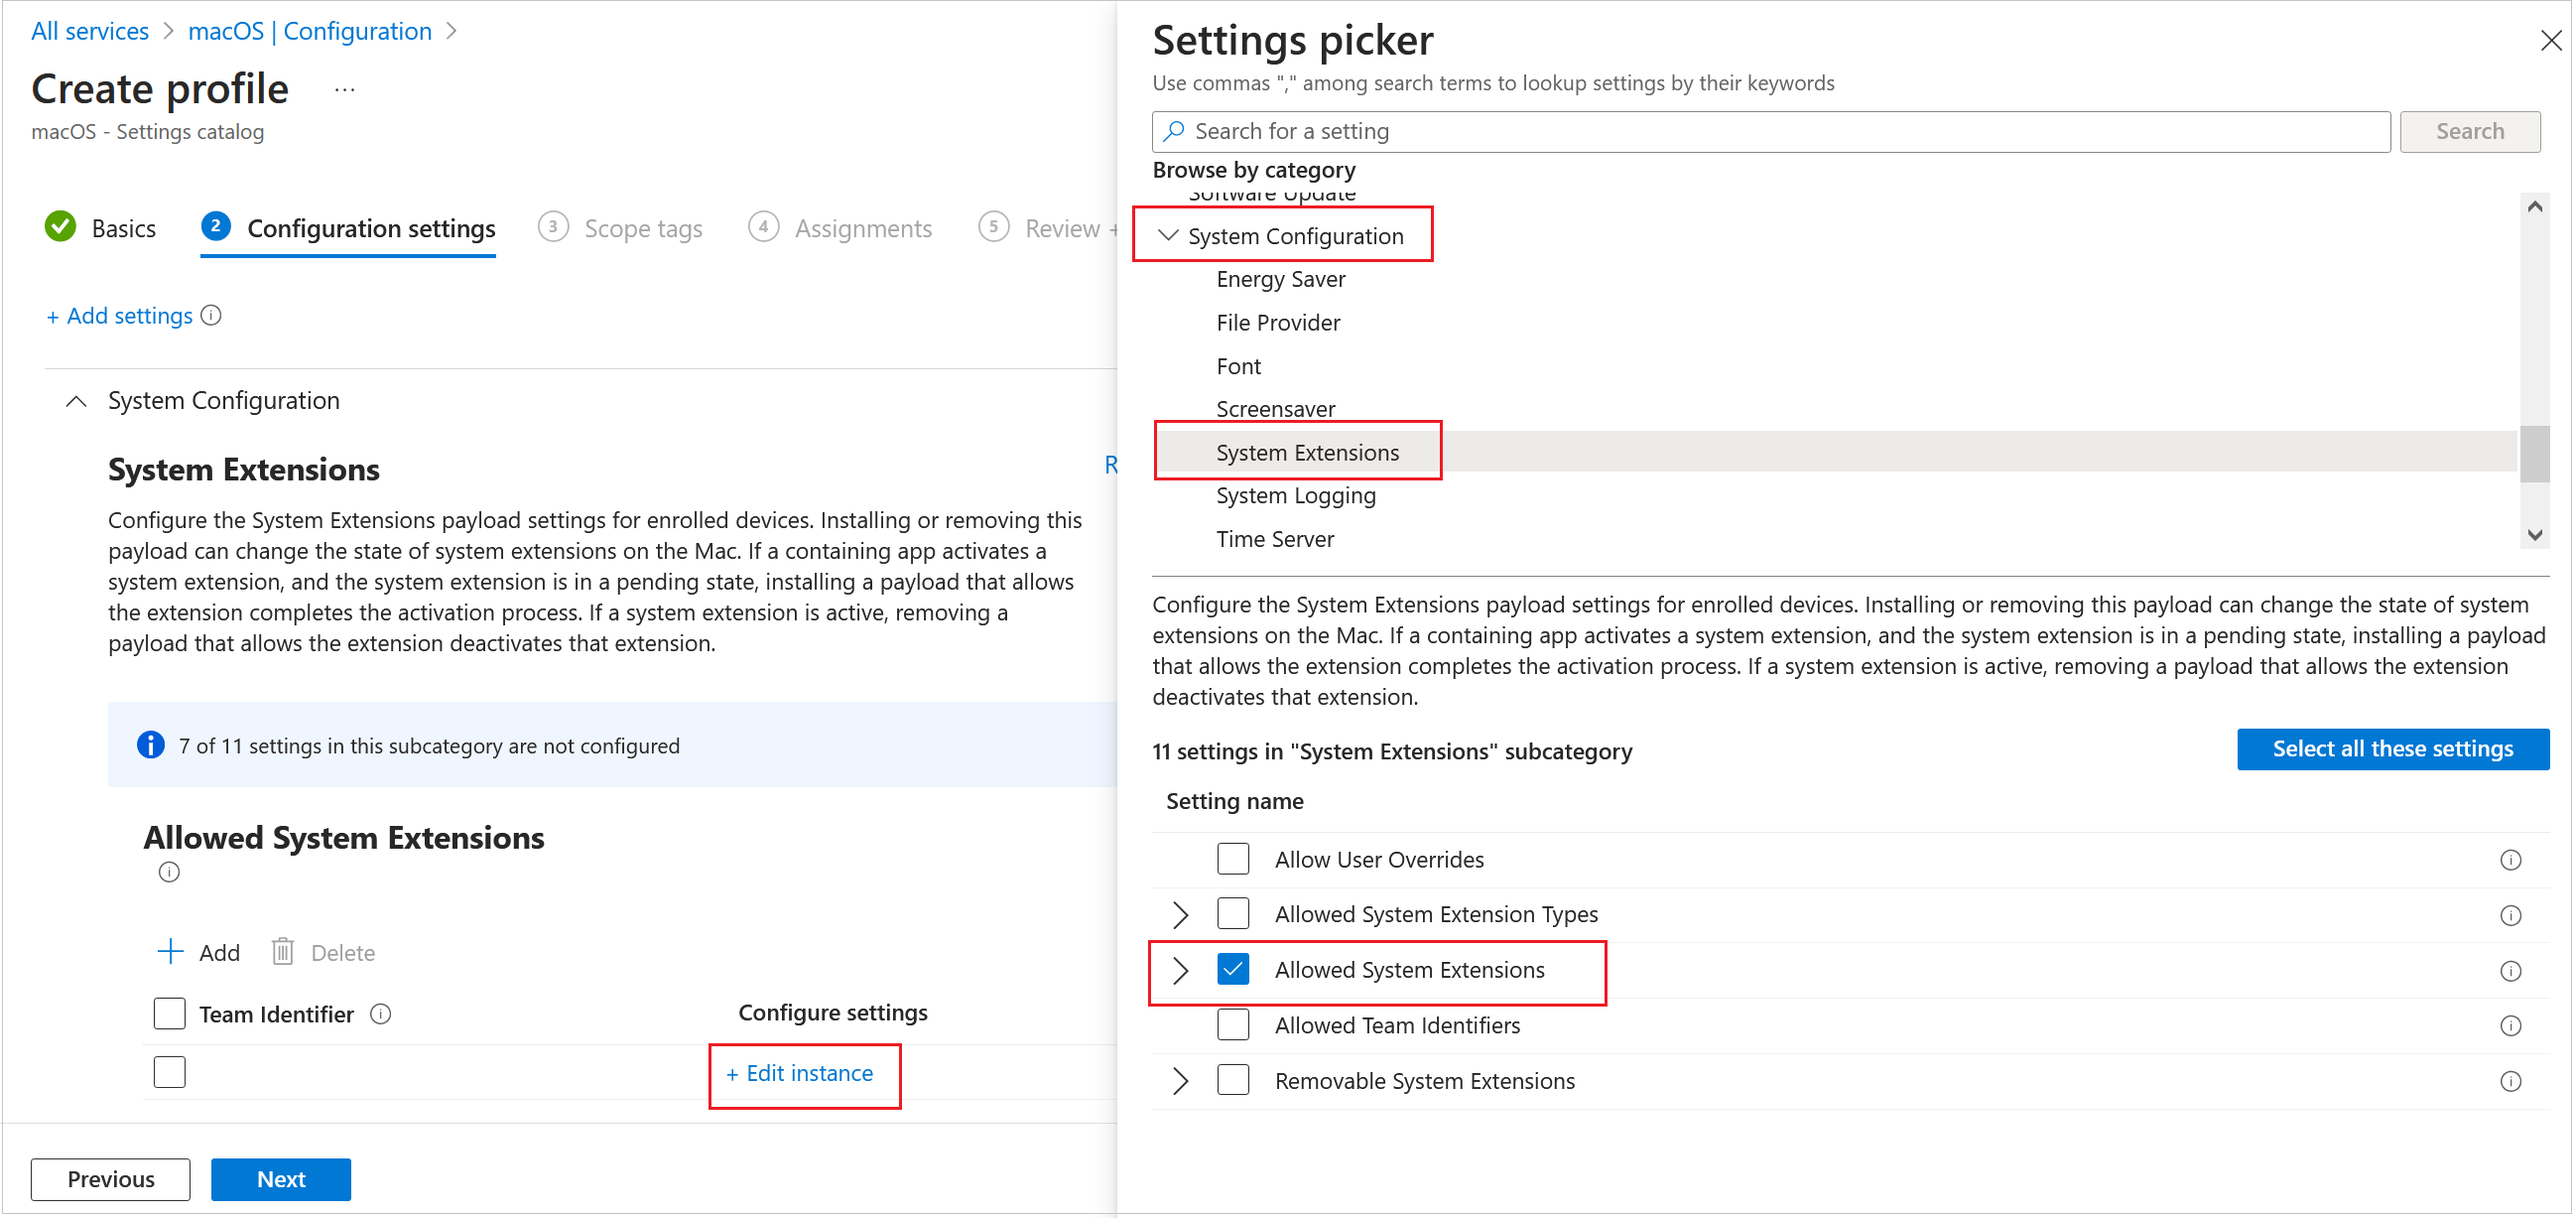
- In the Allowed System Extensions section, click Edit Instance.
- Add two bundle identifiers with the D3U2N4A6J7 team identifier:
- com.protection.agent
- com.protection.agent.next
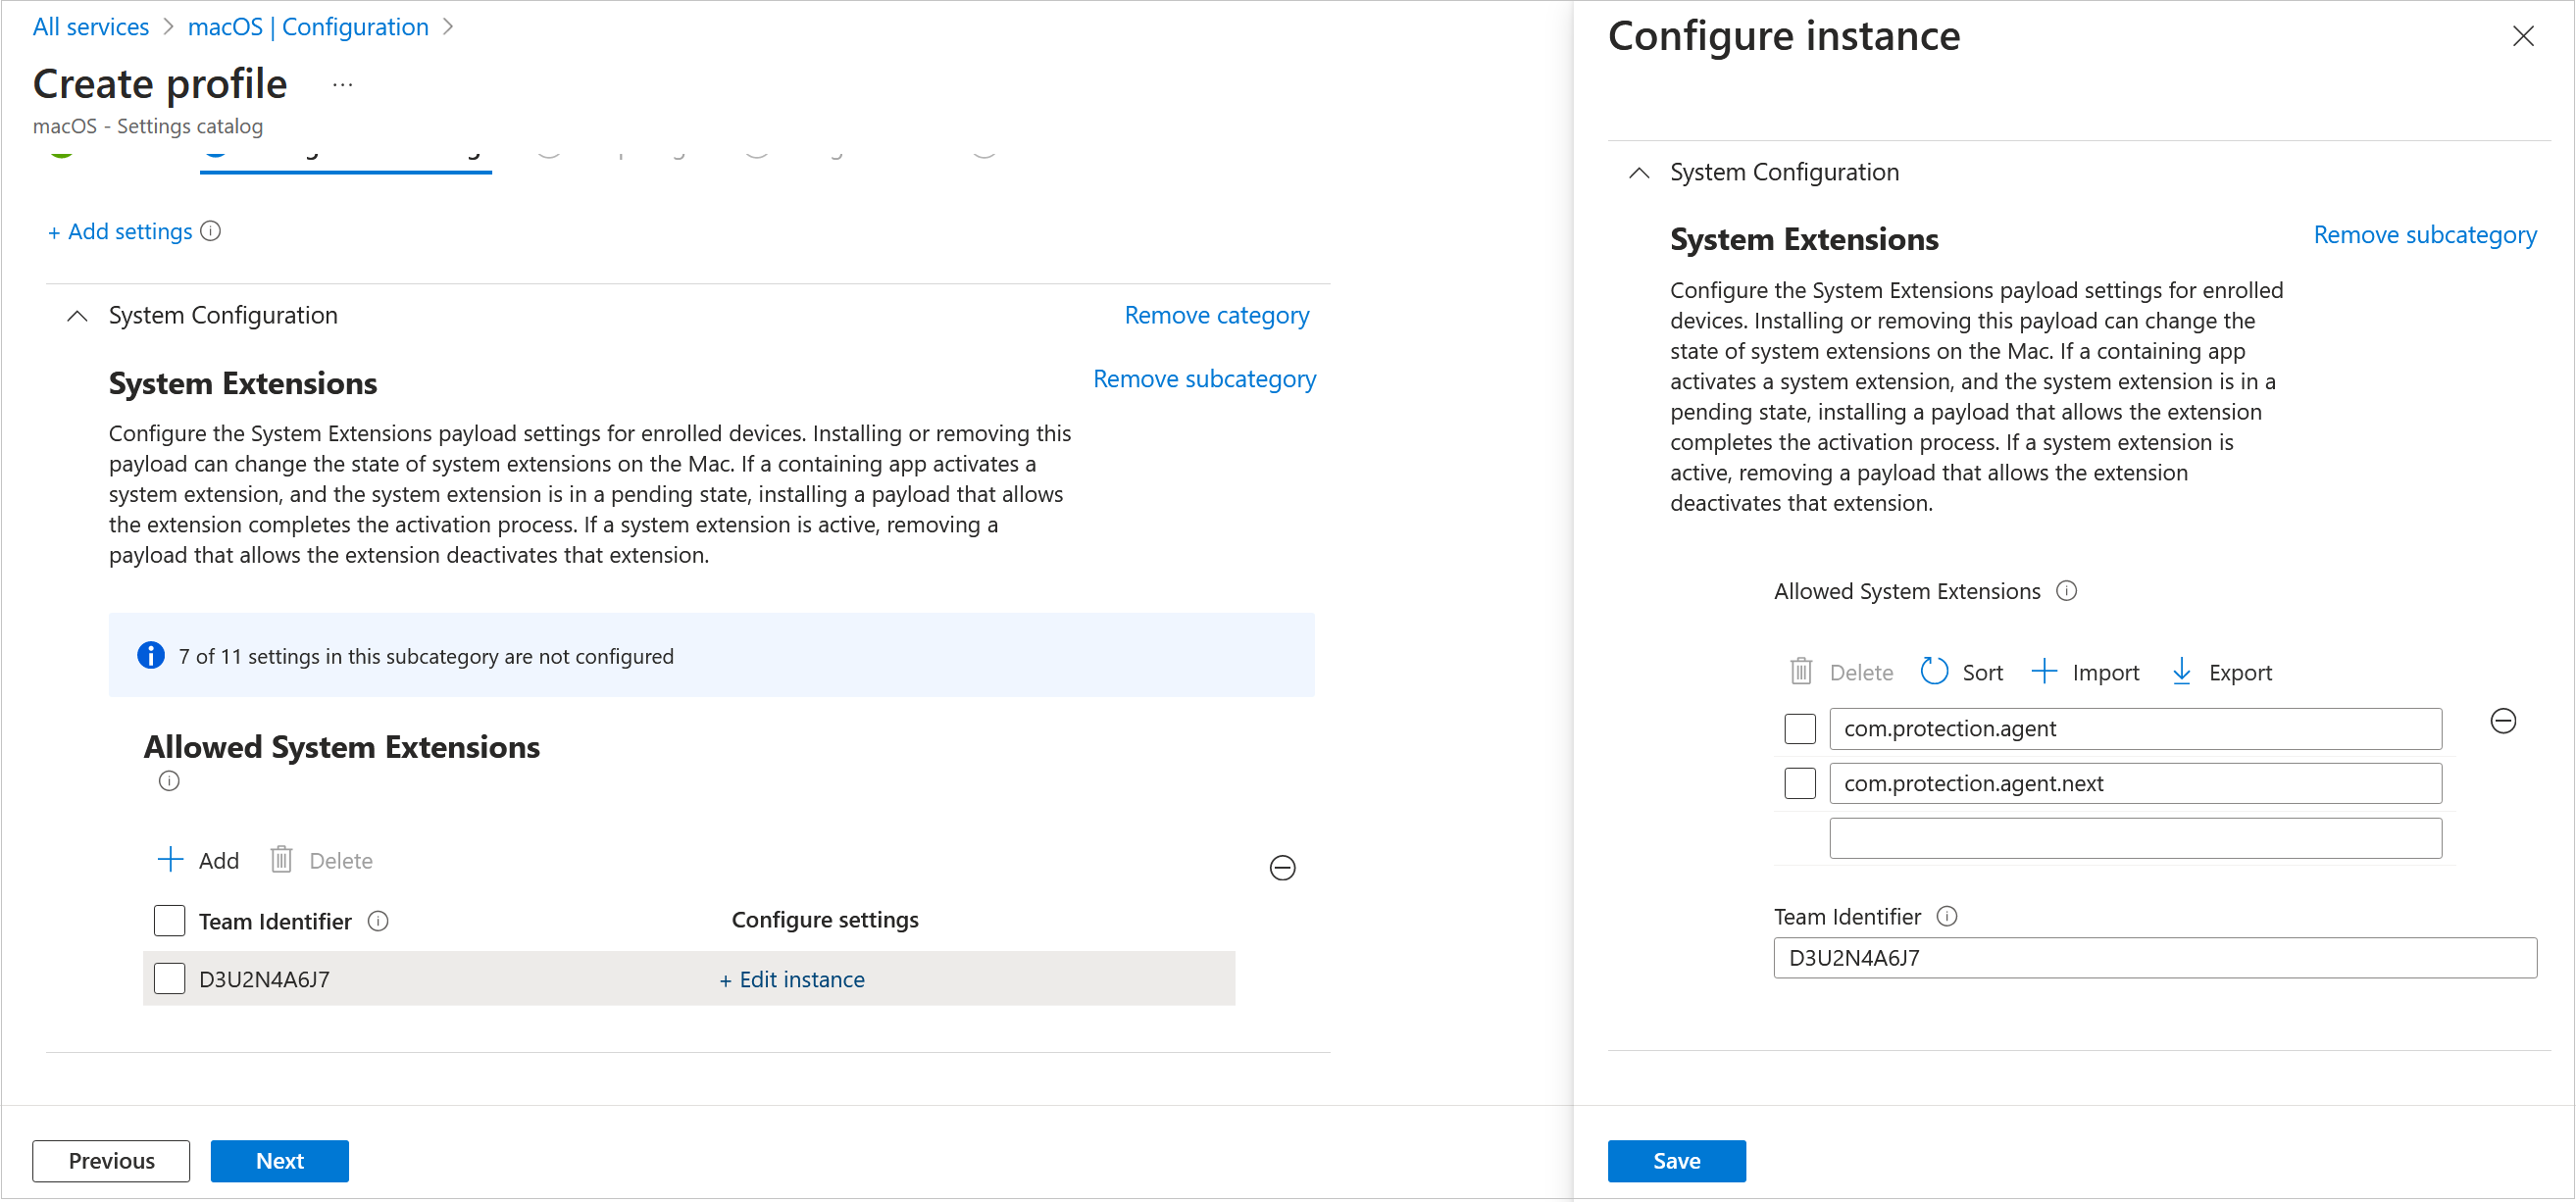
- Click Save. Click Next.
- In the Assignments page, select the group of devices that you want to assign this profile to.
- Click Next.
- Review the profile for completeness. Click Previous if you want to return to a previous step.
- Click Create to create the profile.
Complete Activation of the Network Extensions
For network extensions, you must accept the system extension in the macOS settings preferences to complete activation of the network extension.
To complete activation of the network extension:
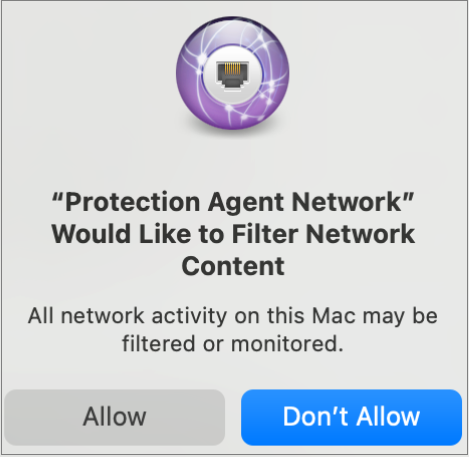
- Open the alert interface on the Mac.
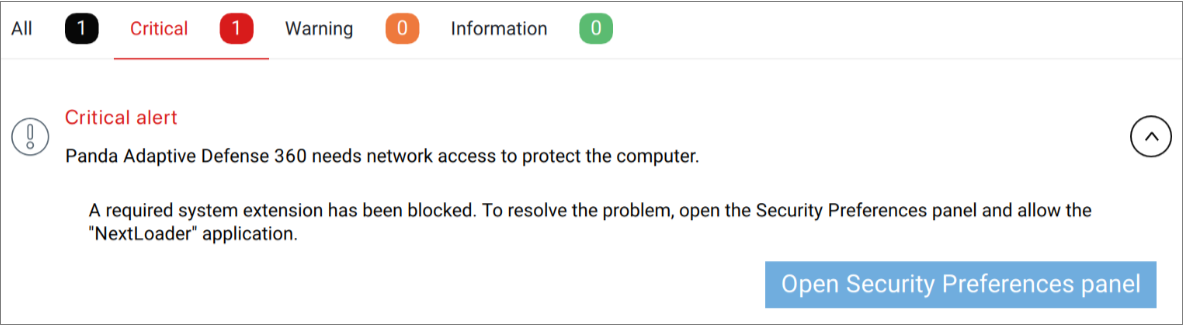
- Click Open Security Preferences Panel.
This network extension attempts to run in the background: /Applications/Endpoint-Protection.app/Contents/MacOS/EndpointProtectionService.app/Contents/MacOS/NextLoader.app/Contents/MacOS/psanwatchdog --loadNext - From the macOS settings preferences, accept the system extension specified in the previous procedure.
- To allow the Protection Agent Network to filter network content, click Allow.
Create a Policy to Automatically Allow the Content Filter
You can create a policy to use the Endpoint Security content filter. You can also create a list of allowed web links and restricted web links.
To create a policy to automatically allow the content filter, from the Intune Admin Center:
- From the left panel, select Devices.
- Select macOS.
- Select Configuration.
- Click Create > New Policy.
The Create a Profile page opens. - From the Profile Type drop-down list, select Settings Catalog.
- Click Create.
- Select Web Content Filter.
- Select the check boxes for these settings:
- Filter Packet Provider Bundle Identifier
- Filter Packets
- Filter Sockets
- Organization
- Plugin Bundle ID
- User Defined Name

- In the User Defined Name text box, type EndpointProtectionNetwork.
- In the Plugin Bundle ID text box, type com.protection.agent.next.
- In the Organization text box, type D3U2N4A6J7.
- Enable the Filter Sockets toggle.
- Enable the Filter Packets toggle.
- In the Filter Packet Provider Bundle Identifier text box, type com.protection.agent.next.
- In the Filter Data Provider Bundle Identifier text box, type com.protection.agent.next.
- Click Next.
- In the Scope Tags page, click Next.
- In the Assignments page, select the group of devices that you want to assign this profile to.
- Click Next.
- Review the profile for completeness. Click Previous if you want to return to a previous step.
- Click Create to create the profile.
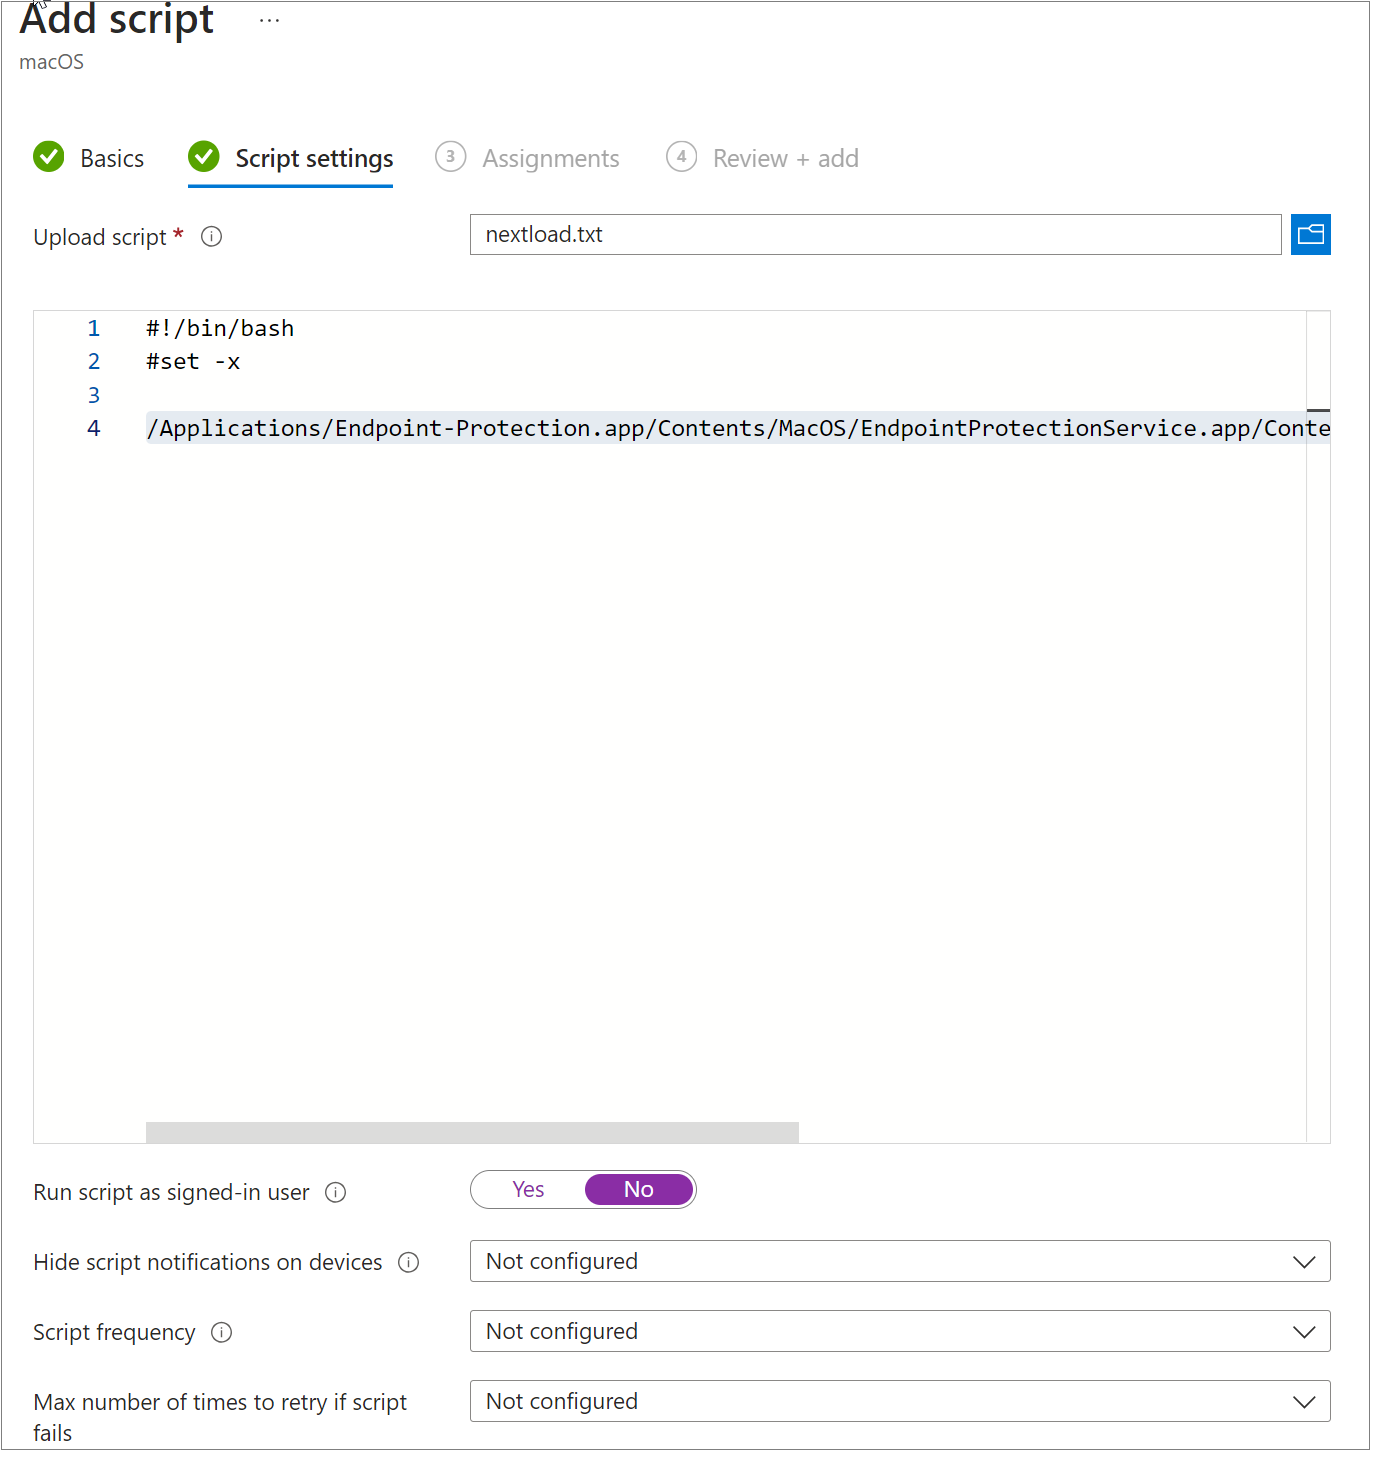
Create a Script to Prevent Network Access Alerts
Before you begin, make sure that you have created the configuration you want to install and you have deployed WatchGuard Endpoint Security to the Mac computer. This script emulates the activity of the user clicking the window, which dismisses the alert and causes the network extension technology to start.
In the Intune Shell Script window, add this text:
/Applications/Endpoint-Protection.app/Contents/MacOS/EndpointProtectionService.app/Contents/MacOS/NextLoader.app/Contents/MacOS/psanwatchdog –-loadNext
Deploy the InTune Configuration Policies
In this section, you deploy WatchGuard Endpoint Security and create a shell script to deploy the configuration to the Mac. The shell script can take up to eight hours to reach each Mac. If you want to deploy the script immediately to the computer, you can click Check State in the portal app on the Mac to force deployment.
To create a deployment script:
- Download the wg_Agent_intune_install.sh script as a baseline from here.
- Install WatchGuard Endpoint Security on the Mac or group of Macs you want to apply the Intune profiles to. For more information, go to Install the Endpoint Security Software on Mac Computers.
- Open the Intune Admin Center.
- From the left panel, select Devices.
- Select macOS.
- Select Shell Scripts.
- Click Add.

- Enter a Name for the script.
- Click Next.
- In the Script Settings step, upload a script that includes the download URL for the installation of WatchGuard Endpoint Security on the Mac computers.
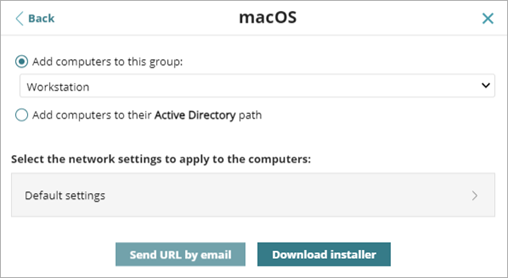
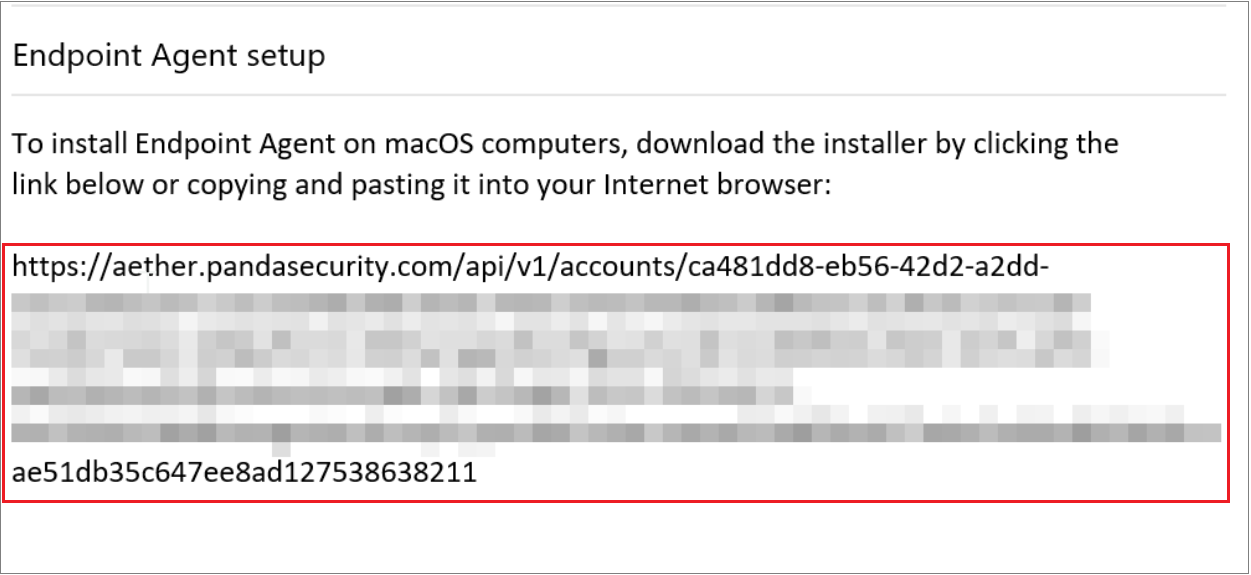
To copy the download URL, in the Endpoint Security management UI, select Computers > Add Computers > macOS > Send URL by Email.
Copy the long link from the email message and paste it in the script settings. For example:
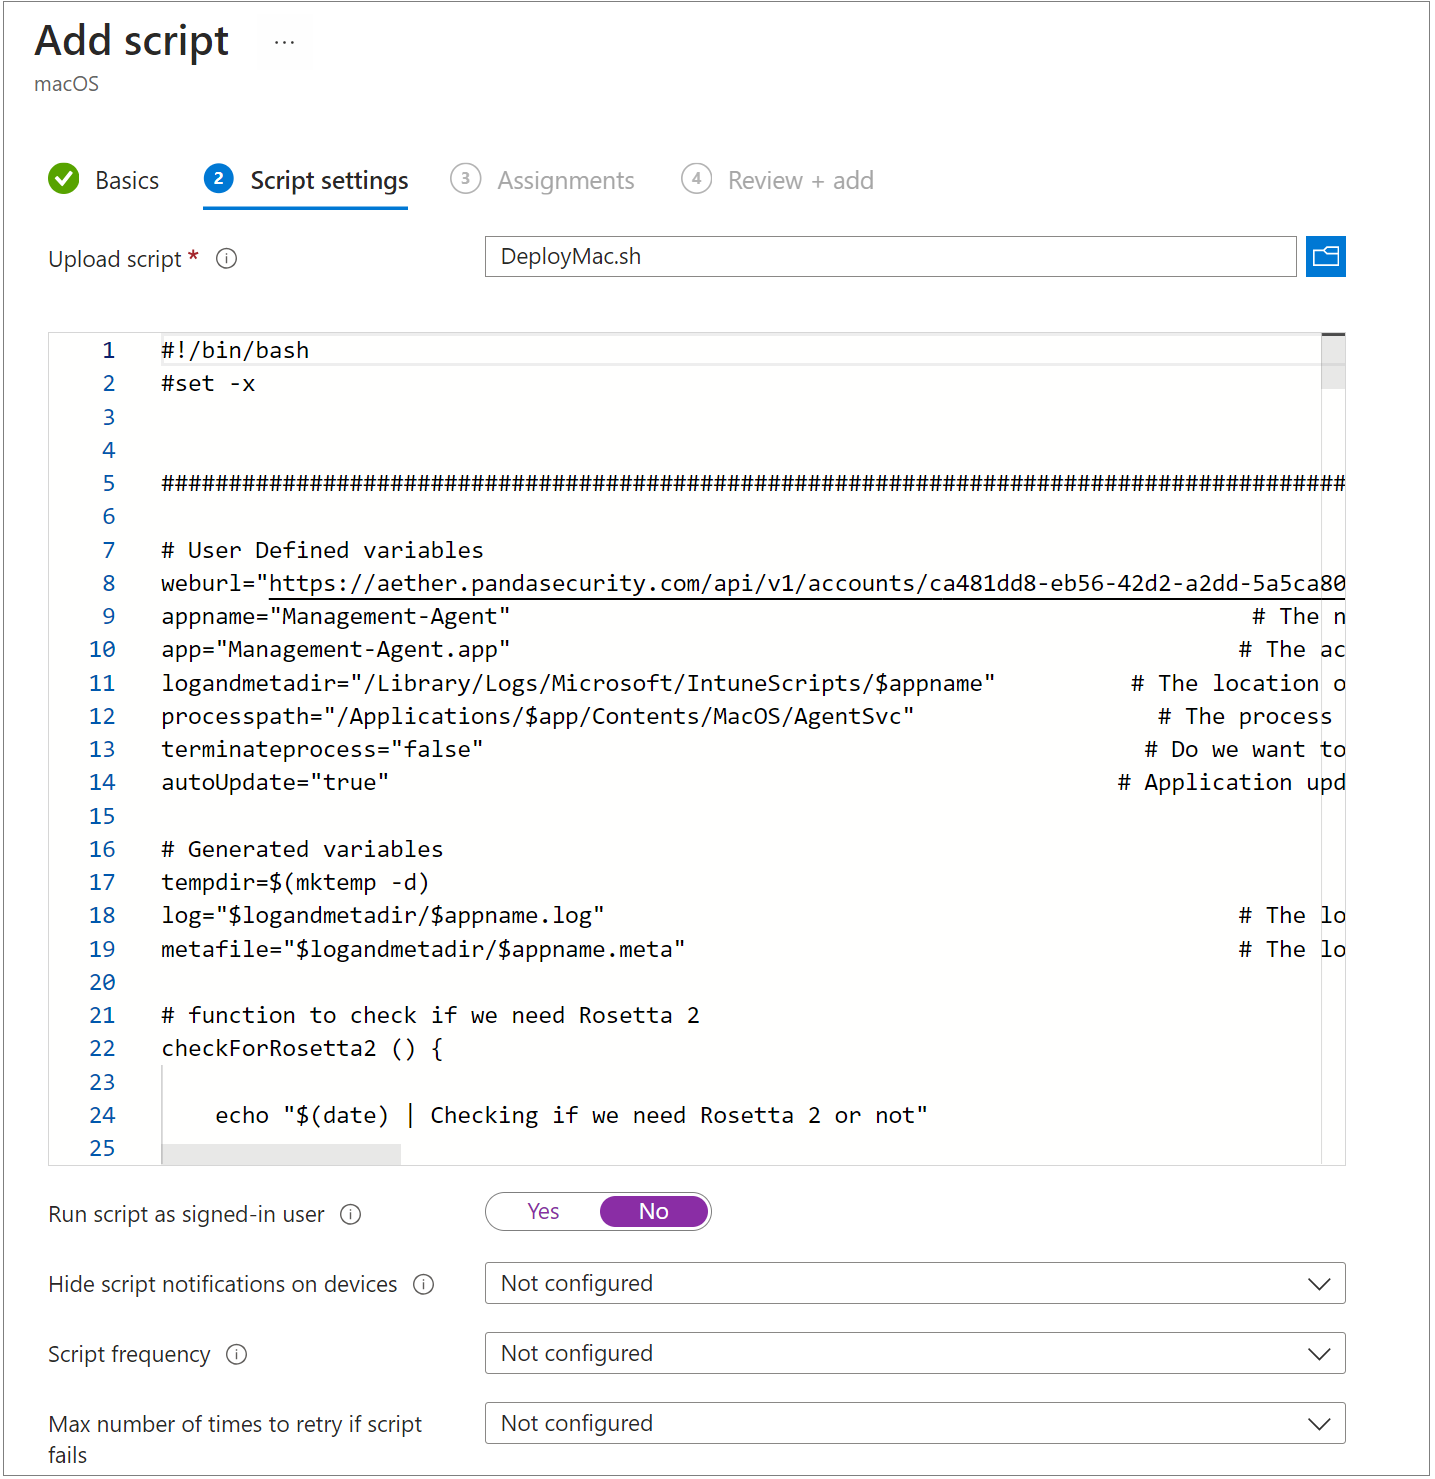
- Make sure Run Script as Signed-in User is set to No. The enables the script to run at root.
- Configure the remaining script settings, as required.
- Hide script notifications on devices
- Script frequency
- Max number of times to retry if script fails
- Click Next.
- In the Assignments page, select the group of devices that you want to assign this profile to.
- Click Next.
- Review the profile for completeness. Click Previous if you want to return to a previous step.
- Click Create to create the profile.
Install the Endpoint Security Software on Mac Computers