Applies To: ThreatSync+ NDR
To optimize the collection, identification, and detection of network-based cyberattacks, we recommend you follow these best practices to set up and configure ThreatSync+ NDR:
- Before You Begin
- Recommended Firebox Settings
- Verify Firebox Traffic
- Configure Collectors to Collect Network Traffic
- Policy and Zone Recommendations
- Review Discovered Asset and Subnet Suggestions
- Recommended Alerts and Notification Rules
- Configure Scheduled Reports
- Review and Respond to Smart Alerts
Before You Begin
Before you set up and configure ThreatSync+ NDR, make sure that you meet the prerequisites specified in Quick Start — Set Up ThreatSync+ NDR.
Recommended Firebox Settings
Before you enable and use ThreatSync+ NDR, make sure:
- You have a Firebox that is managed in WatchGuard Cloud or uses WatchGuard Cloud for logging and reporting visibility.
- You enable the Send a log message for reports or Send a log message check box in each policy on your locally-managed Firebox that is configured to send log data to WatchGuard Cloud.
- Send a log message for reports — For a packet filter policy that allows connections, this check box appears in the Logging settings. For proxy policies, this setting is in the proxy action, and is called Enable logging for reports.
- Send a log message— For a packet filter or proxy policy, this check box appears in the Logging settings.
- You upgrade any Firebox in your WatchGuard Cloud account to Fireware v.12.10.3 or higher. For instructions on how to upgrade your Firebox from WatchGuard Cloud, go to Upgrade Firmware in WatchGuard Cloud.
Verify Firebox Traffic
After you enable ThreatSync+ NDR, the service automatically starts to monitor and analyze Firebox traffic logs from all Fireboxes associated with the account that are managed in WatchGuard Cloud or are configured to send log and report data to WatchGuard Cloud for visibility.
ThreatSync+ NDR analyzes traffic log messages in 30 minute blocks, and uses machine learning and other advanced analytics to identify threats. You can expect to see data in the ThreatSync+ user interface (from the Monitor menu) approximately one hour after you start your trial.
On the Network Summary page, make sure the Total Devices and Total Traffic widgets show non-zero values.

Configure Collectors to Collect Network Traffic
When you install and configure the ThreatSync+ NDR Collection Agent (for Windows or Linux) and the Windows Log Agent to collect data from third-party switches and firewalls, we recommend that you follow these best practices:
- When you install an agent, make sure you are logged in to a dedicated computer with a dedicated administrator account. For Windows computers, the administrator account you use to install the agent must always remain logged in.
- Make sure the dedicated computer has antivirus software installed and running.
- Make sure to restart the computer the agents are installed on if there is a power outage or if there is an automatic update that requires a reboot.
- For Windows computers, make sure you configure devices to send sFlow and NetFlow data to the Windows IP address of the collector and not to the IP address of the Windows Subsystem for Linux (WSL).
For more information, go to About ThreatSync+ NDR Collectors.
Policy and Zone Recommendations
To minimize your response time and maximize network protection, we recommend you configure and tune your policies to:
- Reflect the security policies of your organization.
- Apply policies only to parts of your network that your organizational policies govern.
- Reflect the appropriate severity for your organization.
We recommend these policy and zone configuration best practices:
- Start with a small, manageable set of policies. We recommend that you start with the subset of 33 policies that are included in the Ransomware Prevention Defense Goal Report. For more information, go to Ransomware Prevention Policies.
- Tune these policies so that you only receive alerts that are actionable — alerts that you can respond to and remediate so that the alert does not recur.
- Deactivate policies that do not apply to your network.
- Use zones to reduce the number of IP addresses, organizations, and domains that a policy covers so that you only enforce rules for those systems that are required. For example, instead of the All Internal IP Addresses zone, you can create another zone that includes only the subnets that you want to receive alerts for. For more information, go to About ThreatSync+ Policies and Zones.
- Create additional policies that expand the protection of your network and tune them to prevent too many alerts.
For more information, go to Policy Tuning.
We recommend that you wait two to three days before you configure policies so ThreatSync+ can monitor and learn about your network.
Review Discovered Asset and Subnet Suggestions
To help ThreatSync+ make better decisions about the seriousness of threats, identify your important assets. You respond differently to an attack on a critical asset than a non-critical asset. When you define assets and assign importance levels to them, ThreatSync+ can better prioritize alerts.
Over time, new assets join your network and existing assets change roles. The Discover page in the ThreatSync+ UI shows you when this occurs so you can create a new asset or update an existing one. It is important to regularly review unidentified assets.
Asset suggestions recommend one of three types of actions:
- Accept a new asset that has not yet been configured.
- Add an additional role to an existing asset.
- Remove a role from an existing asset.
We recommend these best practices for discovered assets:
- We recommend that you accept discovered assets. The more that ThreatSync+ knows about critical assets in your network, the more effective ThreatSync+ is to alert you to important threats.
- If you do not recognize a suggested asset, it might be unauthorized. We recommend that you tag it and take corrective action immediately.
- Label subnets so that it is easier to recognize different parts of your network. For example, IP addresses are difficult to keep track of because they look similar. If you attach organization names and tags to your internal subnets, you can label them to make it easier to understand the potential threats that ThreatSync+ shows in Smart Alerts, behaviors, and policy alerts. Like devices, subnet suggestions show on the Discover page.
For more information, go to ThreatSync+ NDR Asset Discovery.
Recommended Alerts and Notification Rules
It is good practice to monitor alerts in the ThreatSync+ UI as they are generated. You can view the Network Summary page for an overview of trends in your network, including detailed information about Smart Alerts and policy alerts.
To make it easier to respond to threats in your network, we recommend that you configure WatchGuard Cloud to send email notifications when ThreatSync+ detects a threat or vulnerability. To set up email notifications, you specify which policy alerts and Smart Alerts generate a notification when they are created or updated.
For more information about notification rules, go to Configure ThreatSync+ Alerts and Notification Rules.
Configure Scheduled Reports
Reports help you monitor threats and identify potential vulnerabilities in your network. We recommend that you schedule ThreatSync+ reports to run in WatchGuard Cloud. Each scheduled report can contain multiple reports. WatchGuard Cloud sends scheduled reports as a zipped .PDF email attachment to the recipients you specify.
We recommend you schedule the two default reports:
Executive Summary Report
The ThreatSync+ Executive Summary report provides an overview of the threats and vulnerabilities that ThreatSync+ detects. This report shows an overall threat score for your network and detailed metrics to help you identify areas for improvement. For more information, go to ThreatSync+ NDR Executive Summary Report.
Ransomware Prevention Defense Goal Report
The ThreatSync+ Ransomware Prevention Defense Goal Report monitors your network for vulnerabilities that can make your organization more susceptible to ransomware. This report is a key component to help you prevent ransomware attacks. For more information, go to Ransomware Prevention Defense Goal Report.
For more information, go to Schedule ThreatSync+ Reports.
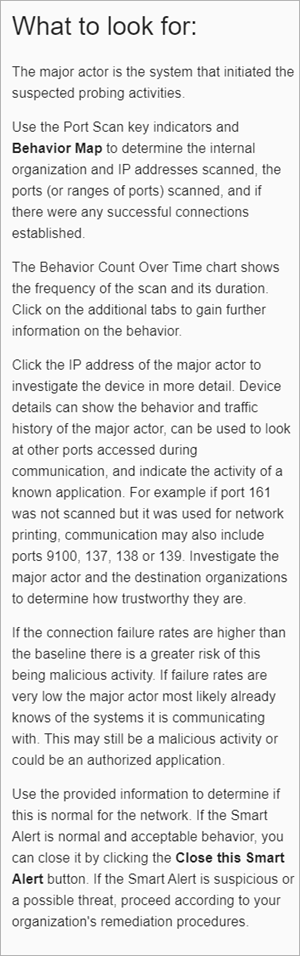
Review and Respond to Smart Alerts
We recommend you start your Smart Alert review with the What to Look For section to learn more about the type of threat and review the suggestions to remediate. It is good practice to first address behaviors that occur later in the cyberattack process, such as exfiltration, but it is also important to address the earlier threats to catch an attack early.
The What to Look For section shows important information about the type of Smart Alert and recommendations about how to review and diagnose the threat. Every Smart Alert shows the What to Look For section on the Summary tab and also on every behavior type tab that describes specific Smart Alert activity.
For more information, go to Review Smart Alert Details.
Close Smart Alerts
It is important to close a Smart Alert after you review and remediate it. This enables you to keep track of open Smart Alerts and also enables ThreatSync+ to track how quickly you complete the review and remediation process. Because ThreatSync+ continuously learns your network, when you close Smart Alerts, you provide valuable feedback that helps the ThreatSync+ artificial intelligence (AI) to better understand your network and interpret future Smart Alerts.
We recommend you set up and configure the Executive Summary Report to view metrics of how many Smart Alerts are open for a specific time period, and how quickly operators address them. For more information, go to ThreatSync+ NDR Executive Summary Report.
Quick Start — Set Up ThreatSync+ NDR