Applies To: WatchGuard Advanced EPDR
For information about how to open an investigation graph, go to Investigation Graph Window.
You can configure the appearance of the graphs to help you to more easily interpret the data. You can also configure nodes to show information about the parent and child nodes, group nodes that are related to one another, and expand or collapse a node group.
For more information about the characteristics of the group nodes, go to About Node Groups.
About Node Groups
In graphs that contain a large number of items, you can group nodes that are related to one another to simplify the chart. You can expand or collapse a node group.
Node groups have these characteristics:
- Actions you take on a node group affect all nodes that are in the group.
- You can group nodes of different types.
- When you delete a group, you delete all nodes that are in the group.
- When you collapse a group, all relationships between the nodes in the group and external nodes are represented as if they were established with the group. Arrows that reflect relationships of the same type (same type of event) are also grouped.
- The empty area of an expanded group represents the set of nodes in the group. For example, to open the context menu for all nodes in a group, right-click an empty area of the expanded group. If you select Delete, you delete all nodes in the group.
- A node that belongs to an expanded group behaves in the same way as a node that is not in a group. You can move the node individually, open its context menu, and delete it.
- A group can consist of nodes, other groups, or a combination of nodes and groups.
In an investigation graph, you can:
Configure Graph Appearance
You can configure the graphs to show the details in horizontal, vertical, and circular charts. You can also zoom in and out of the charts to better view the available data.
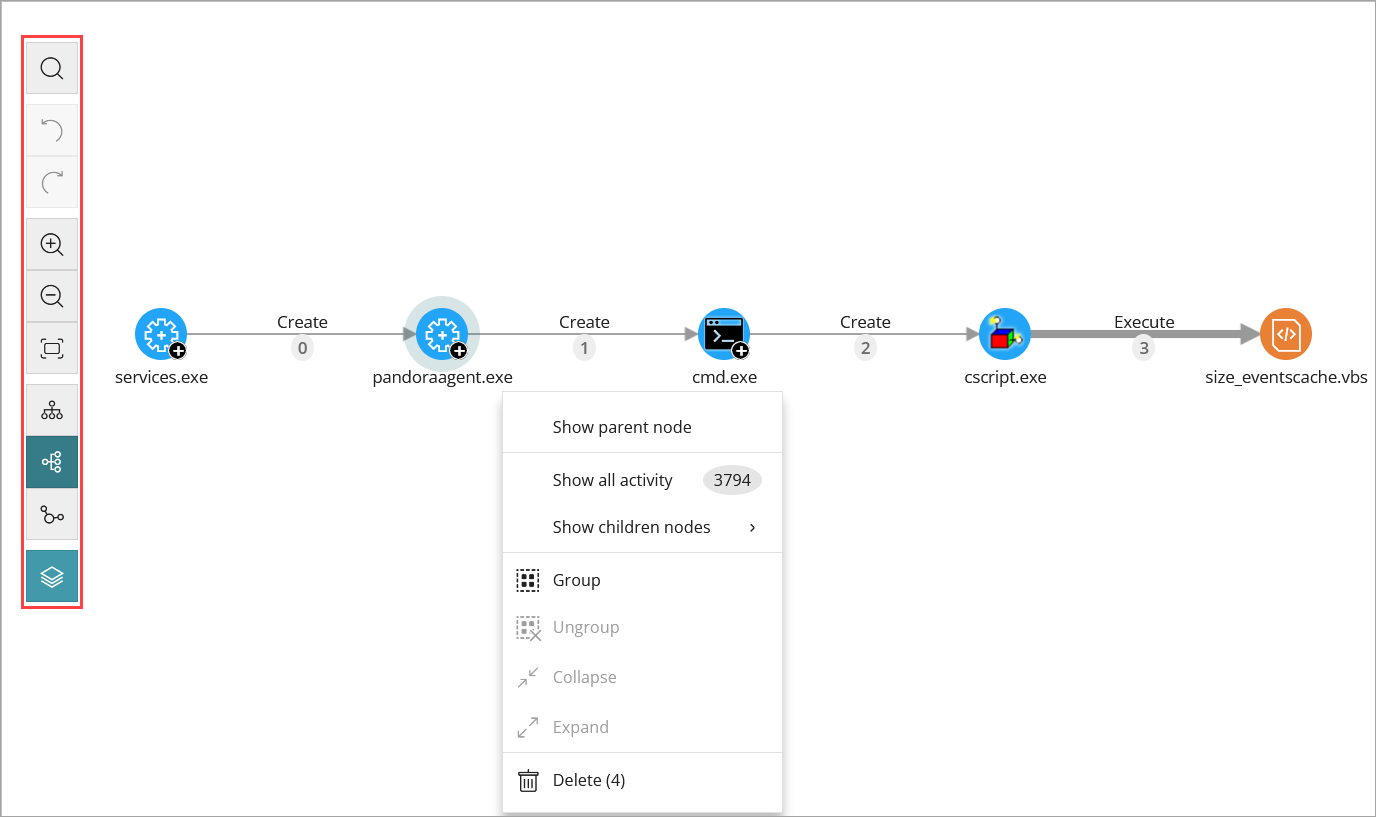
You can use these icons to perform actions on the graph:
| Icon | Description |
|---|---|
|
|
Undo the last action performed on the graph. |
|
|
Redo the last action performed on the graph. |
|
|
Zoom in. |
|
|
Zoom out. |
|
|
Return to the default zoom setting. |
|
|
Change the graph orientation to horizontal. |
|
|
Change the graph orientation to vertical. |
|
|
Change the graph representation to circle. |
|
|
Show or hide information layers in the graph. |
When you click the ![]() icon, a drop-down list opens with these options:
icon, a drop-down list opens with these options:
- Execution Sequence — Hides or shows numbers on the events to determine the order in which events occurred.
- Name of Relationships — Hides or shows the names of the events.
- Name of Entities — Hides or shows the name of the nodes.

Configure Node Details
You can configure the graphs to show information about the parent and child nodes for a particular node, group nodes that are related to one another, and expand or collapse a node group.
To configure these settings, in an investigation graph:
- Right-click a node.
The context menu opens.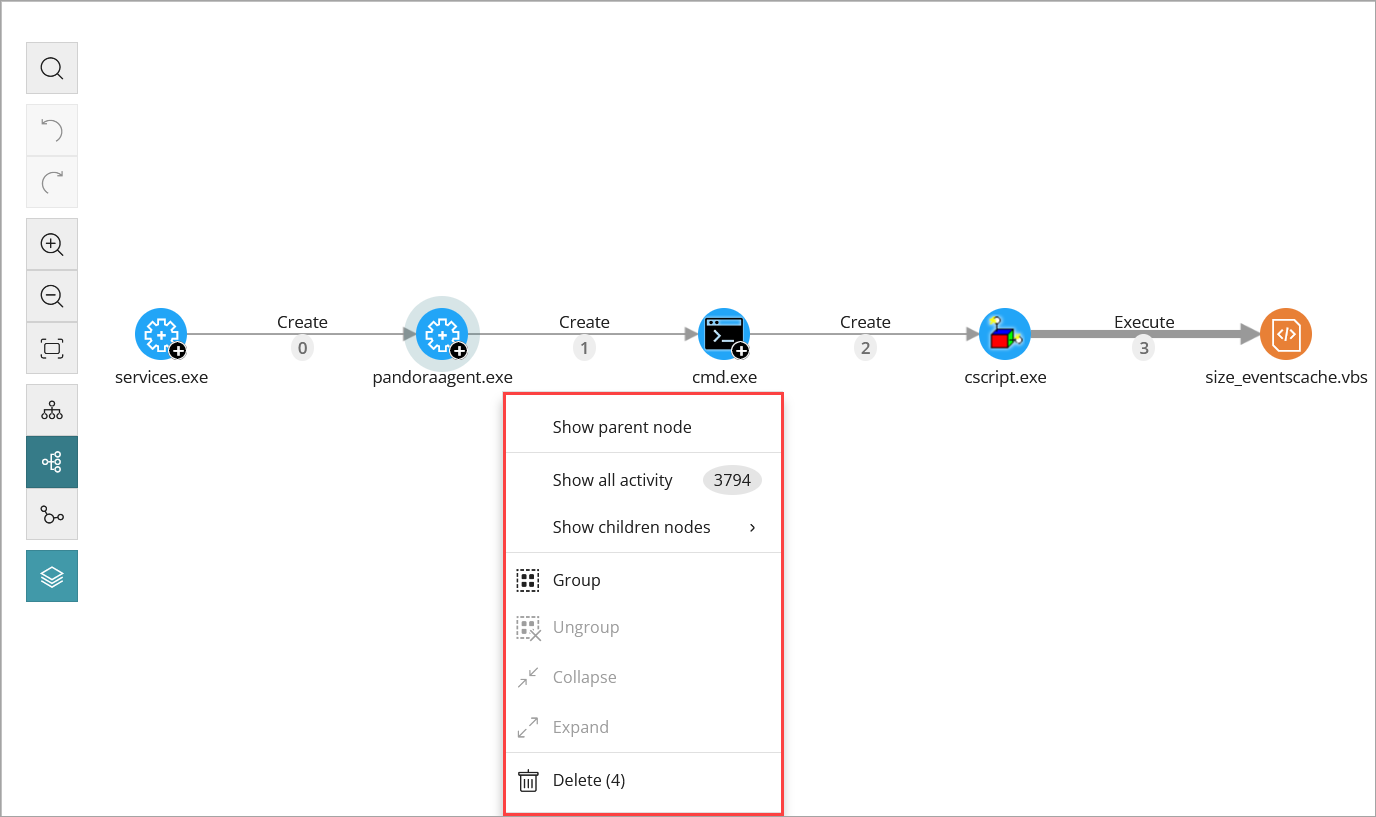
- Select one of these options:
- Show Parent Node — Shows the parent node.
- Show All Activity — Shows all activities for the selected node.
- Show Children Nodes — Shows all child nodes of the selected node.
- Group — Creates a node group. For more information about how to create a group of nodes, go to Create a Node Group.
- Ungroup — Removes the node group. For more information about how to remove a node group, go to Remove the Node Group.
- Collapse — Collapses a node group. For more information about how to collapse a node group, go to Collapse a Node Group.
- Expand — Expands a collapsed node group. For more information about how to expand a collapsed group, go to Expand a Collapsed Node Group.
- Delete — Deletes the node from a graph. For more information about how to delete nodes, go to Delete Nodes from a Graph.
Options that are not available based on the status of the node are disabled.
Select Nodes
When you select and right-click several nodes on the graph, the options that apply to all selected nodes show in the context menu.
To select a single node on the graph:
- Click the node.
To select multiple nodes that are located separately on the graph:
- Press and hold the Ctrl or Shift key, then click the nodes you want to select.
To select multiple nodes that are located together on the graph:
- Press and hold the Ctrl or Shift key, then click an empty area of the graph.
- Drag the mouse to draw a selection box that covers all the nodes you want to select.
Create a Node Group
To create a node group:
- Select multiple nodes on the graph, then right-click one of the nodes.
A context menu opens. - Select Group.
A rectangle shows that contains all nodes in the group.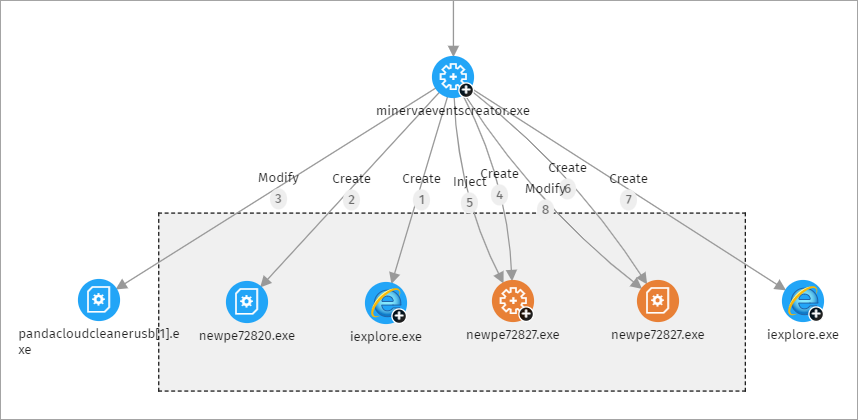
Remove the Node Group
To remove a node group:
- Right-click the node group.
A context menu opens. - Select Ungroup.
The nodes reappear on the graph and the rectangle disappears.
Collapse a Node Group
To collapse a node group:
- Create a group.
- Right-click an empty area in the node group.
The context menu for the group opens.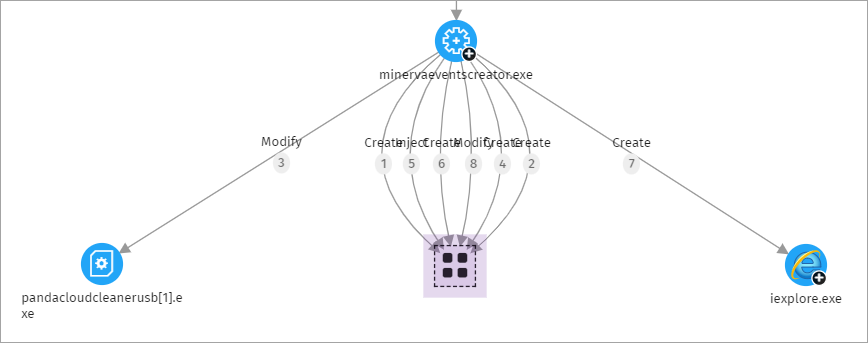
- Select Collapse.
The node group is replaced with a small square and all relationships with the nodes in the group point to the square.
A collapsed node group can contain nodes classified as goodware, malware, or unclassified. This is indicated by the color of the group.
| Color | Description |
|---|---|
|
|
Group with blocked items. |
|
|
Group with items classified as goodware. |
You can see the number of nodes that are in the collapsed group in the upper-left corner of a collapsed group.
Expand a Collapsed Node Group
To expand a collapsed node group:
- Right-click the collapsed node group.
A context menu opens. - Select Expand.
The previously collapsed nodes show in a rectangle.
Delete Nodes from a Graph
When you delete a node from the graph, you delete the selected node and its child nodes.
To delete a single node:
- Right-click the node you want to delete.
The context menu opens. - Select Delete.
- Click OK.
To delete multiple nodes:
- Select the nodes you want to delete, then right-click one of the nodes.
The context menu opens. For information on how to select multiple nodes, go to Select Nodes. - Select Delete.
A dialog box opens and shows the total number of nodes that will be deleted from the graph. This includes the selected nodes and their child nodes. - Click OK.
Move Nodes
To move all nodes and lines on the graph:
- Click an empty area of the graph. Drag the graph in the appropriate direction.
To move a single node:
- Select the node and drag it to a new location.
All lines that connect the node with its neighbors move and adjust themselves to the new location of the node.
Search Nodes
In an investigation graph, you can filter the nodes, highlight nodes of interest, and quickly view their details.
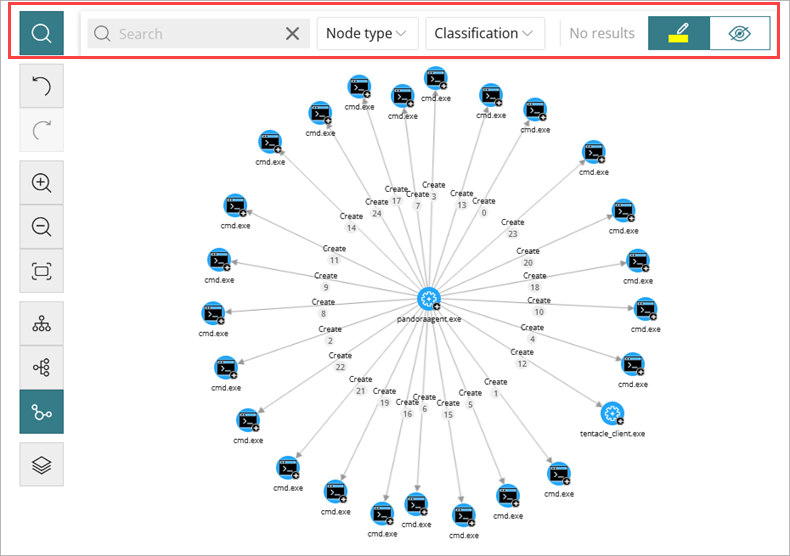
In an investigation graph, use these options to search or highlight the required nodes:
- Search Icon
 — To show or hide the search bar.
 - Search Bar — Type the character string you want to search for. The search runs in real time only on the names and details of nodes.
To avoid showing orphaned nodes in search results, the parent node is always included, even if it does not match the entered pattern. The content of arrows is excluded from searches.
- Node Type — Searches the graphs based on the type of node you select. To extend searches to include more than one type of node:
- Select the drop-down list, then select the types of node that you want to search for. To search across all types of nodes, click Clear Search.
- Classification— Searches the graphs based on the classification of nodes, such as goodware, malware, and suspect.
- Items Found — Shows the number of nodes that match the search pattern entered.
Select the drop-down list next to the number of items found, then select:- Select Found Nodes — Selects the nodes that match the search criteria entered. To show the context menu, right-click one of the selected items.
- Select All Nodes Except Found Nodes — Selects nodes that do not match the search criteria entered. To show the context menu, right-click one of the selected items.
- Highlight Found Item — Highlights found items in yellow.
Collapsed groups are highlighted if any of the nodes in the group match the search criteria. Otherwise, the group is not highlighted.
- Hide items — Hides items that do not match the search criteria.
Collapsed groups are shown if at least one of the nodes in the group matches the search criteria. Otherwise, the group is not shown on the graph.
View Timeline
The timeline below the graph enables you to view the nodes and relationships for a selected time range. It includes green bars that represent the events carried out by a threat. You can point to the bars to show the number of events and the date they were logged.
- To hide the pane, click Hide Timeline.
- To show the hidden pane, click Show Timeline.
- To select a specific interval on the timeline, move the slider to the left or right.
The graph shows the events and nodes that occurred within the interval. - To return to the default timeline settings, click Reset Timeline.
