Configure an IPv6 DHCP Server
DHCPv6 is a method to assign IPv6 addresses automatically to network clients. When you enable IPv6 for a trusted or optional interface, you can enable the DHCPv6 server on the interface, to assign IPv6 addresses to clients that connect.
Before you can enable the DHCPv6 server, you must enable IPv6 for the interface. For more information, go to Configure IPv6 for a Trusted or Optional Interface.
You cannot use these special purpose IP addresses in the DHCPv6 configuration:
- IP addresses that start with 2002, unless bits 17-48 specify a valid IPv4 address
- IP addresses that start with FE80, because this specifies a link local address
- IP addresses that start with FEC0, because this specifies a site local address
- IP addresses that start with FF, because this is used for IPv6 multicast addresses
Configure DHCPv6 Server Settings
You can configure a DHCPv6 server on a trusted, optional, or custom interface so the DHCP server can assign addresses and prefixes to IPv6 clients that connect.
- Edit a trusted, optional, or custom interface.
- Select the IPv6 tab.
- Select Enable IPv6.
- From the DHCP drop-down list, select Use DHCP Server.
The DHCP server configuration settings appear.
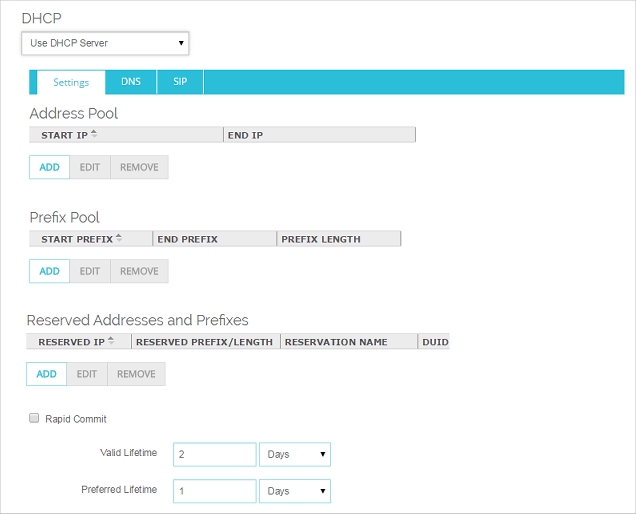
- Edit a trusted, optional, or custom interface.
- Select the IPv6 tab.
- Select Enable IPv6.
- From the DHCP drop-down list, select Use DHCP Server.
- Click Configure.
The DHCPv6 configuration settings appear.
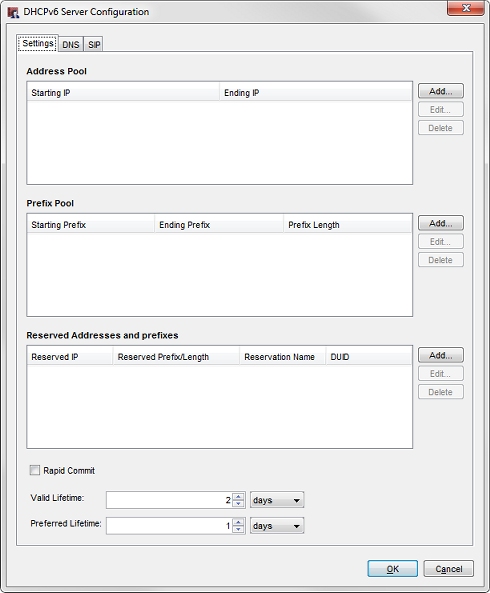
When you configure an interface to use a DHCPv6 server you must add at least one entry to the Address Pool or Prefix Pool.
Configure the DHCPv6 Address Pool
The Address Pool defines the IPv6 addresses that the DHCP server can assign to DHCPv6 clients that connect.
- In the Address Pool section of the Settings tab, click Add.
Add Address Range dialog box appears.
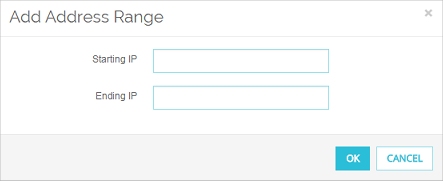
- In the Starting IP and Ending IP text boxes, type two IPv6 addresses in the same prefix range as an IPv6 address configured for this interface.
- Click OK.
- In the Address Pool section of the Settings tab, click Add.
Add Address Range dialog box appears.
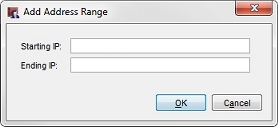
- In the Starting IP and Ending IP text boxes, type two IPv6 addresses in the same prefix range as an IPv6 address configured for this interface.
- Click OK.
If you have enabled DHCPv6 Client Prefix Delegation for an external interface, the Add Address Range dialog box includes a Use prefix delegation check box that you can select to use the delegated prefix in the address range. For more information about how to use a delegated prefix, go to Configure DHCPv6 Client Prefix Delegation.
Configure the DHCPv6 Prefix Pool
The Prefix Pool defines the IPv6 prefixes that the DHCP server can assign to DHCPv6 clients that connect.
- In the Prefix Pool section of the Settings tab, click Add.
Add Prefix Range dialog box appears.
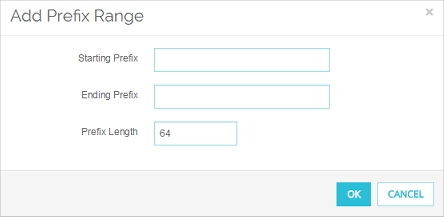
- In the Starting Prefixand Ending Prefix text boxes, type two IPv6 prefixes to define a range of prefixes.
Each prefix must end with :: - In the Prefix Length text box, type the prefix length.
- Click OK.
- In the Prefix Pool section of the Settings tab, click Add.
Add Prefix Range dialog box appears.
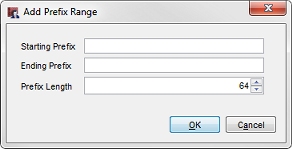
- In the Starting Prefix and Ending Prefix text boxes, type two IPv6 addresses to define a range of prefixes.
- In the Prefix Length text box, type or select the prefix length.
- Click OK.
Configure DHCPv6 Reservations
You can add a reserved address or reserved prefix for a client. A reserved address must be in a range configured in the Address Pool. A reserved prefix must be in a range configured in the Prefix Pool. In a single reservation you can reserve an IP address, a prefix or both for the same client.
To reserve an prefix for another Firebox that connects to this interface, specify the DUID of the external interface of the DHCP client in the prefix reservation. For information about how to determine the client DUID of a Firebox, go to Configure DHCPv6 Client Prefix Delegation.
- In the Reserved Addresses section, click Add.
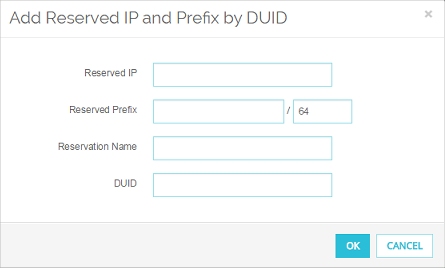
- To reserve an IP address, in the Reserved IP text box, type the IPv6 address to reserve.
- To reserve a prefix, in the Reserved Prefix text boxes type the prefix and prefix length.
- In the Reservation Name text box, type a name for this reservation.
The reservation name cannot start or end with a dot (.) or hyphen (-), and cannot contain an underscore or space. The maximum length of a reservation name is 64 characters. - In the DUID text box, type the DHCPv6 client DUID.
- Click OK.
- In the Reserved Addresses section, click Add.
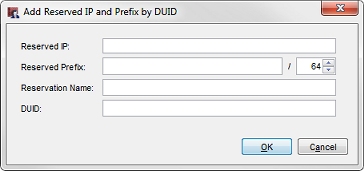
- To reserve an IP address, in the Reserved IP text box, type the IPv6 address to reserve.
- To reserve a prefix, in the Reserved Prefix text boxes type the prefix and prefix length.
- In the Reservation Name text box, type a name for this reservation.
The reservation name cannot start or end with a dot (.) or hyphen (-), and cannot contain an underscore or space. The maximum length of a reservation name is 64 characters. - In the DUID text box, type the DHCPv6 client DUID.
- Click OK.
If you have enabled DHCPv6 Client Prefix Delegation for an external interface, the Add Reserved IP and prefix by DUID dialog box includes a Use prefix delegation check box. You can select this check box to use the delegated prefix in the reserved IP address. For more information about how to use a delegated prefix, go to Configure DHCPv6 Client Prefix Delegation.
Enable Rapid Commit
To get IPv6 addresses from a server, the DHCPv6 client can use a rapid two-message exchange (solicit, reply) or a four-message exchange (solicit, advertise, request, reply). By default, the DHCPv6 client uses the four-message exchange. To use the two-message exchange, you must enable the Rapid Commit option on the Firebox and on the client. Select the Rapid Commit check box to enable the DHCP server to use the rapid two-message exchange to assign an IP address.
Configure IPv6 Address Lifetimes
The IPv6 lifetime settings control the length of time an assigned IPv6 address remains valid and the length of time the address is preferred. To change the default lifetime settings. change the values for Valid Lifetime and Preferred Lifetime. The Valid Lifetime must be greater than or equal to the Preferred Lifetime.
Configure Per-Interface DHCPv6 DNS Servers
By default, when it is configured as a DHCP server, your Firebox gives out the DNS and WINS server information configured on the Network Configuration > WINS/DNS tab. To specify different information for your device to assign when it gives out IPv6 addresses, you can add DNS servers in the DHCPv6 settings for the interface.
- In the DHCP section, select the DNS tab.
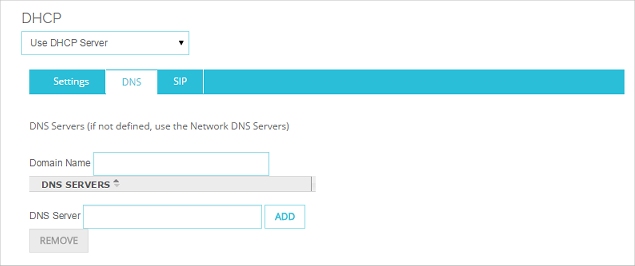
- To change the default DNS domain that the DHCP client appends to unqualified host names, in the Domain Name text box type a domain name.
- In the text box below the DNS Servers list, type the IPv6 address of a DNS server.
- Click Add.
- In the DHCPv6 Server Configuration dialog box, select the DNS tab.
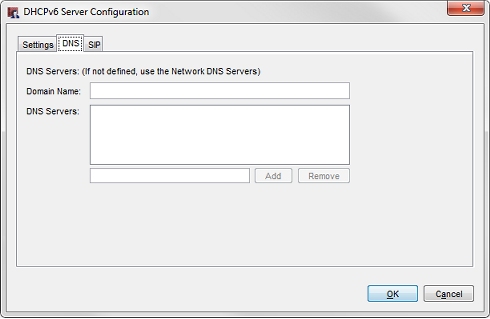
- To change the default DNS domain that the DHCP client appends to unqualified host names, in the Domain Name text box type a domain name.
- In the text box below the DNS Servers list, type the IPv6 address of a DNS server.
- Click Add.
You can add the IP addresses of up to three DNS servers.
Configure DHCPv6 SIP Servers
You can add the IPv6 addresses or domain name of SIP servers to your DHCPv6 server configuration. This enables the DHCPv6 server to provide the SIP server domain name or SIP server IP addresses to SIP clients that request them. You can specify a SIP server domain name, and up to three IP addresses.
- In the DHCP section, select the DNS tab.
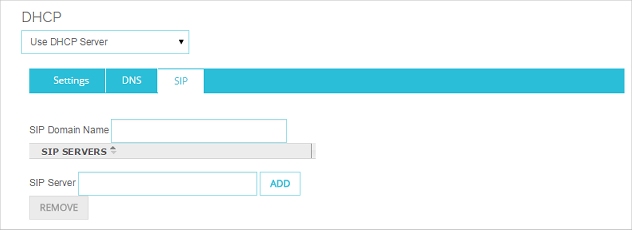
- To specify the SIP server domain. type the domain name in the SIP Domain Name text box.
- To specify a SIP server IP address, in the text box below the SIP Servers list, type the IPv6 address of a SIP server.
- Click Add to add the IP address to the list.
- In the DHCPv6 Server Configuration dialog box, select the SIP tab.
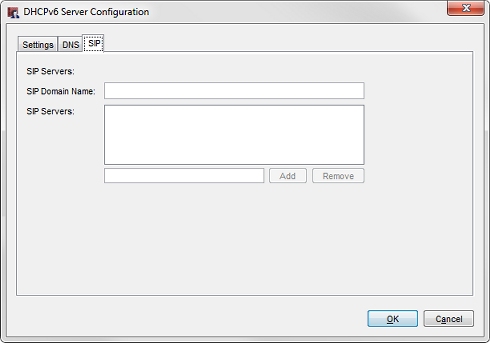
- To specify the SIP server domain. type the domain name in the SIP Domain Name text box.
- To specify a SIP server IP address, in the text box below the SIP Servers list, type the IPv6 address of a SIP server.
- Click Add to add the IP address to the list.