クラウド管理の Firebox の外部 IP アドレスを DNS (動的ドメイン名システム) サービス プロバイダに登録することができます。動的 DNS (DDNS) サービスは、Firebox の外部 IP アドレスが変わった場合に、ドメイン名に関連付けられた IP アドレスが変更されるようにするものです。
WatchGuard Cloud で、以下のいずれかの動的 DNS サービス プロバイダへの接続を構成することができます。
- Dyn.com
- No-ip.com
- Dynu.com
- Dnsdynamic.org
- Afraid.org
- Duckdns.org
Dyn.com は従量制の価格設定を採用しています。他のプロバイダは無料でサービスを提供しています。WatchGuard は、これらのプロバイダと提携していません。WatchGuard Cloud では、上記の動的 DNS サービス プロバイダのみがサポートされています。
仕組み
運用可能な DNS サーバーを使用してクラウド管理の Firebox を構成する必要があります。Firebox は DNS サーバーを使用して、動的 DNS 構成で指定したサービス プロバイダのドメイン名を解決します。次に、Firebox はサービス プロバイダの web サイトのアカウントにログインします。Fireboxは、購入したドメイン名の外部 IP アドレスを登録します。
Firebox は次の場合、更新された情報を直ちに動的 DNS サービス プロバイダに送信します:
- Firebox が DHCP クライアントとして構成され、新しい IP アドレスが ISP によって外部インターフェイスに割り当てられた場合
- Firebox の外部 IP アドレスを手動で変更した場合
- Firebox で動的 DNS 構成を変更した場合
Firebox はまた、既定で 28 日ごとに動的 DNS サービス プロバイダに連絡するように設定されています。更新間隔は、1 日から 28 日までの期間から指定することができます。
WatchGuard Cloud における DNS サーバーの構成については、Firebox DNS 設定を構成する を参照してください。
動的 DNS を構成する
動的 DNS を構成するには、WatchGuard Cloud で以下の手順を実行します。
- 構成 > デバイス の順に選択します。
- クラウド管理の Firebox を選択します。
- デバイス構成 をクリックします。
- ネットワーク タイルをクリックします。
ネットワーク構成ページが開きます。 - ネットワーク ページで、編集する外部ネットワークのタイルをクリックします。
ネットワーク構成ページが開きます。 - 動的 DNS タブを選択します。
動的 DNS の構成ページが表示されます。 - このネットワークの動的 DNS を有効化する を選択します。
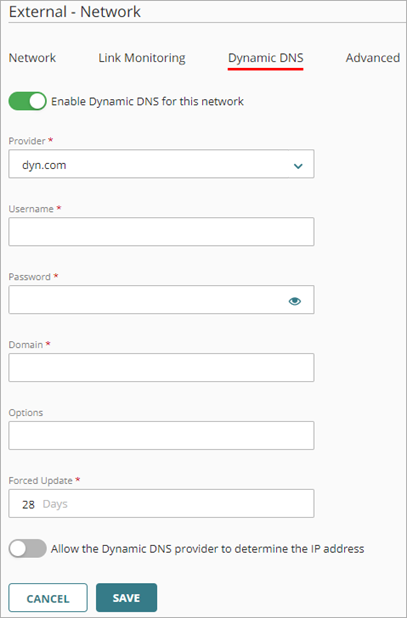
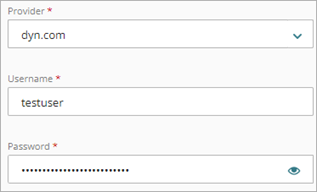
- プロバイダ ドロップダウン リストから、以下のいずれかの動的 DNS プロバイダを選択します。
- Dyn.com
- No-ip.com
- Dynu.com
- Dnsdynamic.org
- Afraid.org
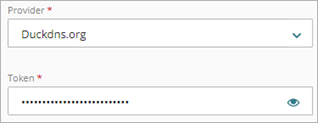
- Duckdns.org
- For providers except Duckdns.org, specify the Username for your dynamic DNS account. This is the account that you configured on your dynamic DNS provider's website.
- For providers except Duckdns.org, specify the Password for your dynamic DNS account.
- For Duckdns.org, specify the Token for your Duckdns.org account.
- ドメイン テキスト ボックスに、動的 DNS プロバイダに登録した FQDN を入力します。
- dyn.com、no-ip.com、dynu.com、duckdns.org の場合は、オプション テキスト ボックスに、以下の 1 つまたは複数のオプションを入力します。
- mx=mailexchanger& — Specifies a Mail eXchanger (MX) for use with the hostname.
- backmx=YES|NO& — Requests that the MX in the previous parameter is set up as a backup MX (includes the host as an MX with a lower preference value).
- wildcard=ON|OFF|NOCHG& — Enables or disables wildcards for this host (specify ON to enable).
- offline=YES|NO — Sets the hostname to offline mode.
You can join one or more options with the ampersand character. For example: &mx=backup.example.com&backmx=YES&wildcard=ON
For more information about these options, see https://help.dyn.com/remote-access-api/perform-update or the documentation from your dynamic DNS service provider.
- In the Forced Update text box, specify a time interval to force an IP address update. Tip!
- For the dynamic DNS provider to use the IP address from your router or NAT device, select the Allow the dynamic DNS provider to determine the IP address check box. Tip!
- To save configuration changes to the cloud, click Save.